Configure advanced Wi-Fi settings in the GFiber App
Manage advanced Wi-Fi settings
-
Open the GFiber App.
-
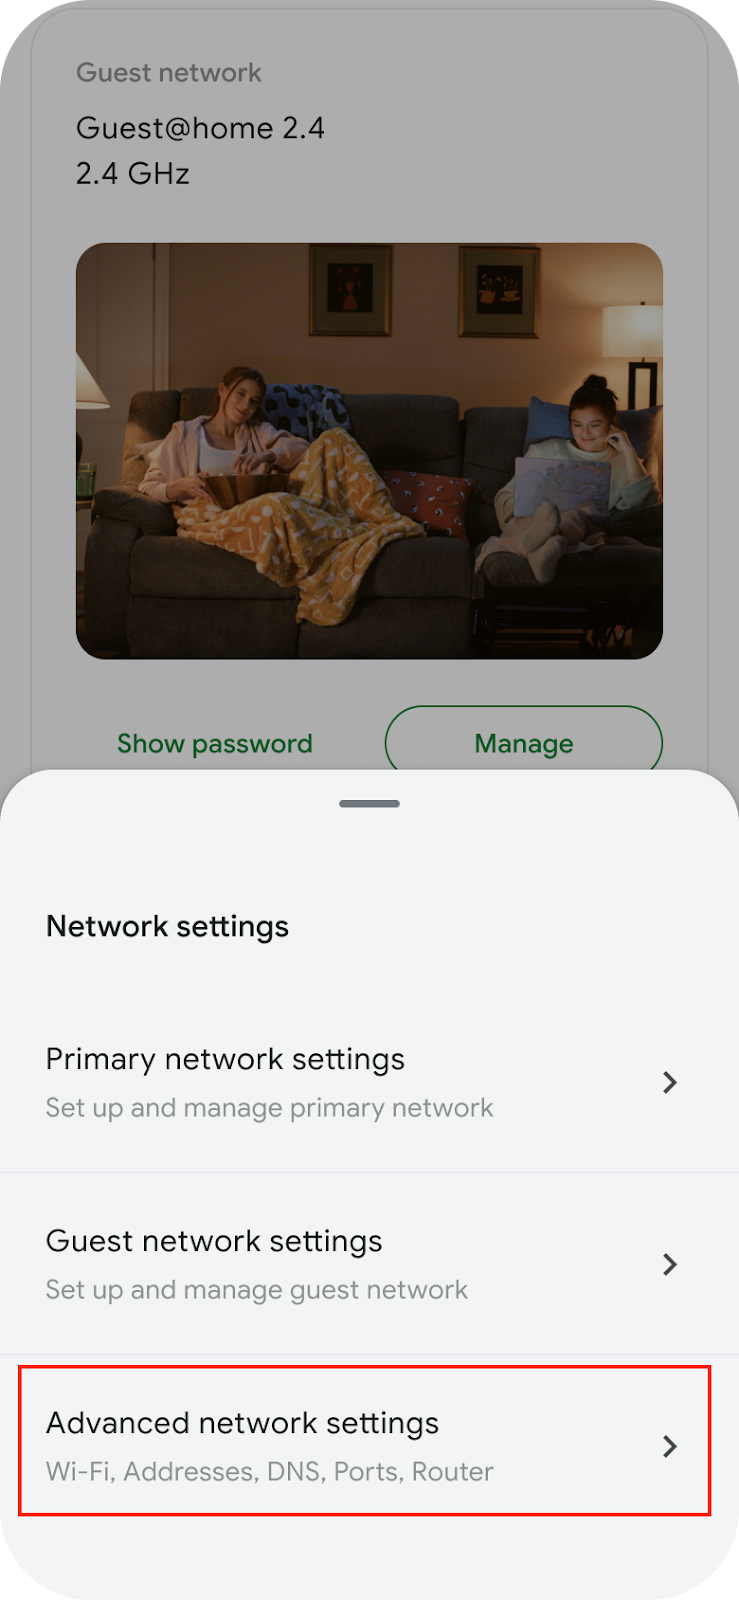
Tap Network.
-
Tap Network settings.
-
Tap Advanced network settings.
-
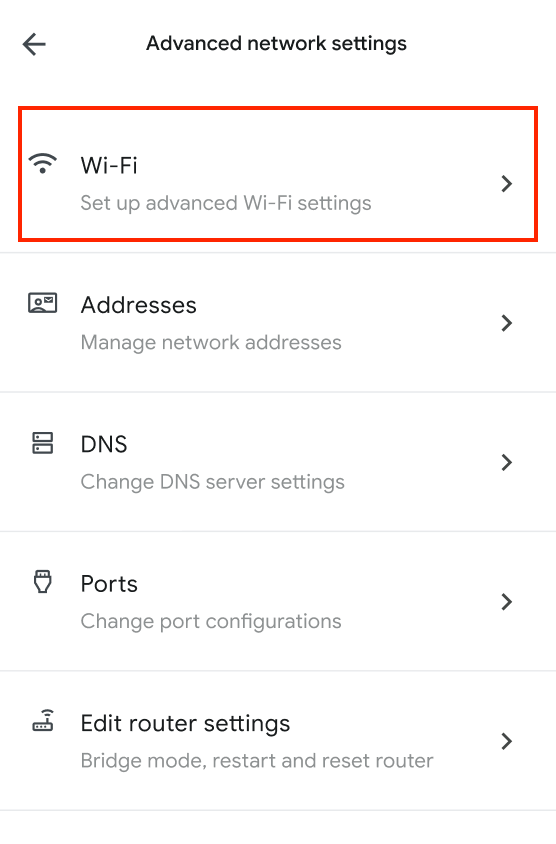
Tap Wi-Fi. Your Wi-Fi settings will appear.
Manage Wi-Fi network names (SSIDs)
Your Wi-Fi network's name is also called an SSID (Service Set Identifier). Most GFiber routers operate on multiple Wi-Fi bands, typically 2.4 GHz, 5 GHz, and 6 GHz (if supported). If you have a Mini Network Box, the 5 GHz band isn’t available — it supports only 2.4 GHz.
Setting a unique SSID for each band is known as a “split SSID,” meaning you have a distinct network name for each Wi-Fi band (e.g., one for 2.4 GHz and another for 5 GHz). While this can be useful for specific devices, we strongly recommend using the same Wi-Fi name for all your bands for the following reasons:
-
Seamless roaming: Devices automatically switch between the 2.4 GHz, 5 GHz, and 6 GHz bands as you move around your home for the strongest signal.
-
Optimized performance: Your router directs devices to the band that will provide the best speed and reliability.
-
Simpler setup: One network name — no need to guess which band to use.
-
Fewer issues: More stable connections with fewer internet drops or slowdowns.
If you’d like to follow our recommendation, here’s how to keep one network name for all your bands:
Use the same Wi-Fi name for all bands (recommended)
-
Follow the instructions at the top of this article to open the Advanced network settings.
-
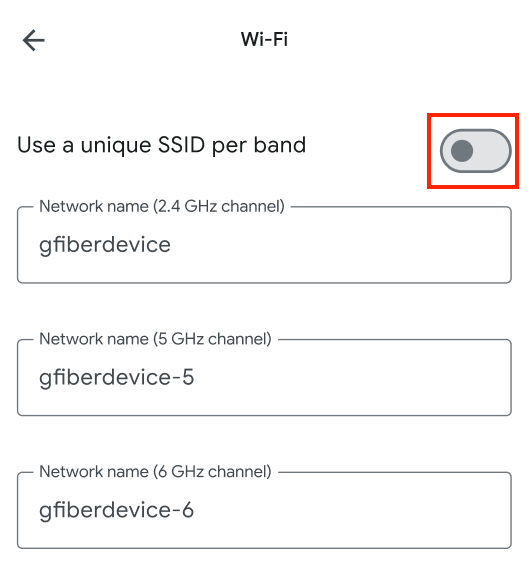
Toggle Use a unique SSID per band off.
-
Tap Save. Your changes take effect immediately.
If you still need to use different Wi-Fi names for each band, here’s how:
Use different Wi-Fi names for each band (split SSID)
-
Follow the instructions at the top of this article to open the Advanced network settings.
-
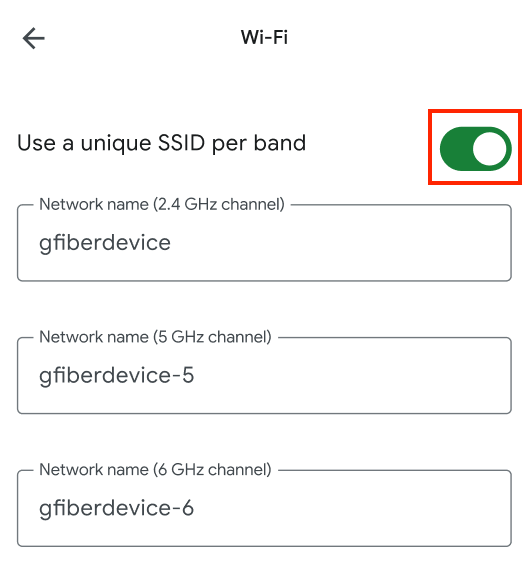
Toggle Use a unique SSID per band On.
-
Enter a name for each band (2.4 GHz, 5 GHz, and 6 GHz if available). SSIDs must be 1 to 32 characters long and are case-sensitive.
 To allow for faster roaming between 5 GHz and 6 GHz bands while allocating 2.4 GHz for specific devices, you can use a unified network name for the 5 GHz and 6 GHz bands, while keeping the 2.4 GHz band separate.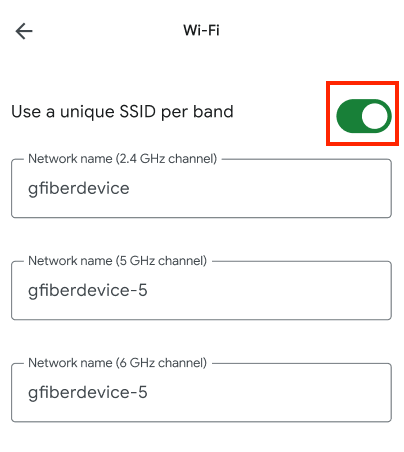
-
Tap Save.
-
Your password is the same across all bands, so you can't set a different one for each.
-
Devices connected to Wi-Fi may briefly disconnect when you click Save.
-
By default, your 2.4 GHz band uses the name you set for your network. The 5 GHz and 6 GHz bands will have “-5” and “-6” added to the name, respectively.

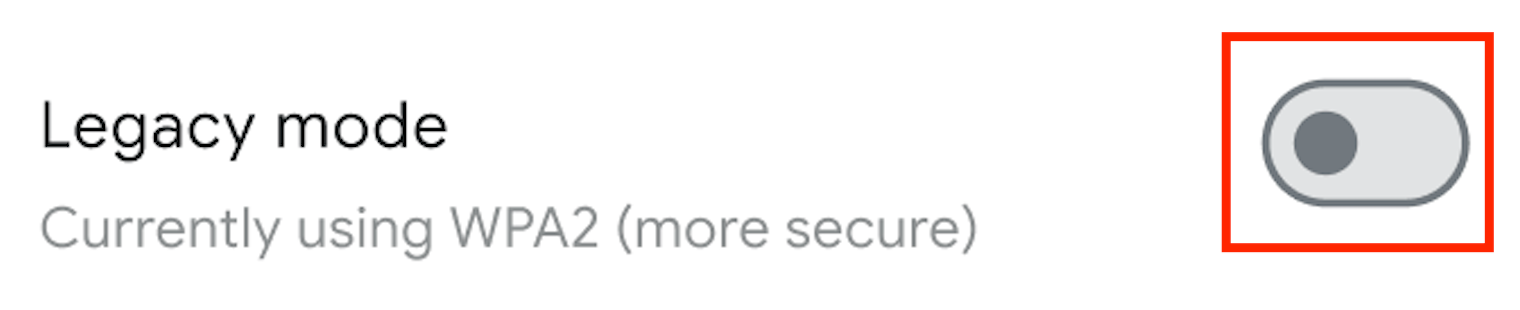
Your GFiber router uses WPA2 encryption by default to provide a secure connection. If you have older devices that only support WPA, you can enable Legacy mode to support both WPA and WPA2.
To enable or disable Legacy mode:
-
Follow the instructions at the top of this article to open the Advanced network settings in the GFiber App.
-
Toggle Legacy mode On or Off.
-
Select WPA/WPA2 (Legacy).
-
Click Save.
Your Wi-Fi network and devices use specific channels to communicate. Think of them like different radio stations — each channel is a number representing a specific radio frequency.
By default, your Network Box or router automatically sets and adjusts its channels. You typically don't need to change this setting. However, you might consider manually selecting a channel if your Wi-Fi appears slower than usual, often due to interference.
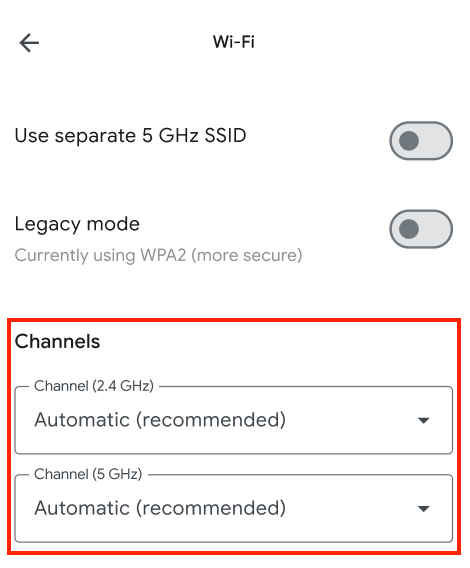
The Channels setting allows you to choose a specific channel for each frequency or retain the automatic setting. You can use a Wi-Fi analysis app to identify which nearby channels have the strongest signal.
To set a channel manually:
-
Follow the instructions at the top of this article to open the Advanced network settings in the GFiber App.
-
Next to Channels, select the channel you want for each frequency (or for the desired frequency) from the drop-down lists.
-
Click Save.
FAQs
-
Open advanced settings: Follow the instructions at the top of this article to open Advanced network settings.
-
Name your networks: Keep your current network name (for example, Lauren’s Home) for your 2.4 GHz band.
- Name your 5 GHz network Lauren’s Home-5.
- If you have a 6 GHz network, name it Lauren’s Home-6.
-
Connect the device: Connect the device you’re troubleshooting to the 2.4 GHz network (Lauren’s Home in this example).
-
Merge the SSIDs: Once the device connects successfully, merge your SSIDs back into a single network. Use your original network name (Lauren’s Home) and the same password.