GFiber Labs 20 Gig Early Access Plan Overview
Thanks to 25G Passive Optical Network (PON) technology, 20 Gig customers have access to premium internet speeds that are also energy-efficient.
Please note that this service is still in its early stages and is not yet widely available. If you do not have 20 Gig but would like to be notified about updates to the plan — including opportunities for early access — you can fill out this form.
Plan Details
20 Gig is available to select residential customers for $250 per month (plus applicable taxes and fees).
Sign Up for 20 Gig
At this time, you must be selected by GFiber Labs in order to sign up for the 20 Gig plan. You can express interest by submitting this form.
Once you’re selected, you’ll have to accept the GFiber Labs Terms of Service to set up your installation date.
Some important things to note
- Because this is an early-access service, a local user interface will be available for troubleshooting and network management of the Wi-Fi 7 Router. You’ll be able to see — but not manage — your 20 Gig service through your GFiber account or on the Google Fiber app.
- You can download the GFiber app from the Google Play Store or the Apple App Store.
- If you experience connectivity issues, feel free to contact us anytime.
- If you need to reschedule your installation appointment, please email us.
20 Gig service with Wi-Fi 7 requires some special equipment. A GFiber Labs installation specialist may schedule some time to come to your house before service is installed to consult with you and help plan your setup. (Self-install kits are not available for 20 Gig.)
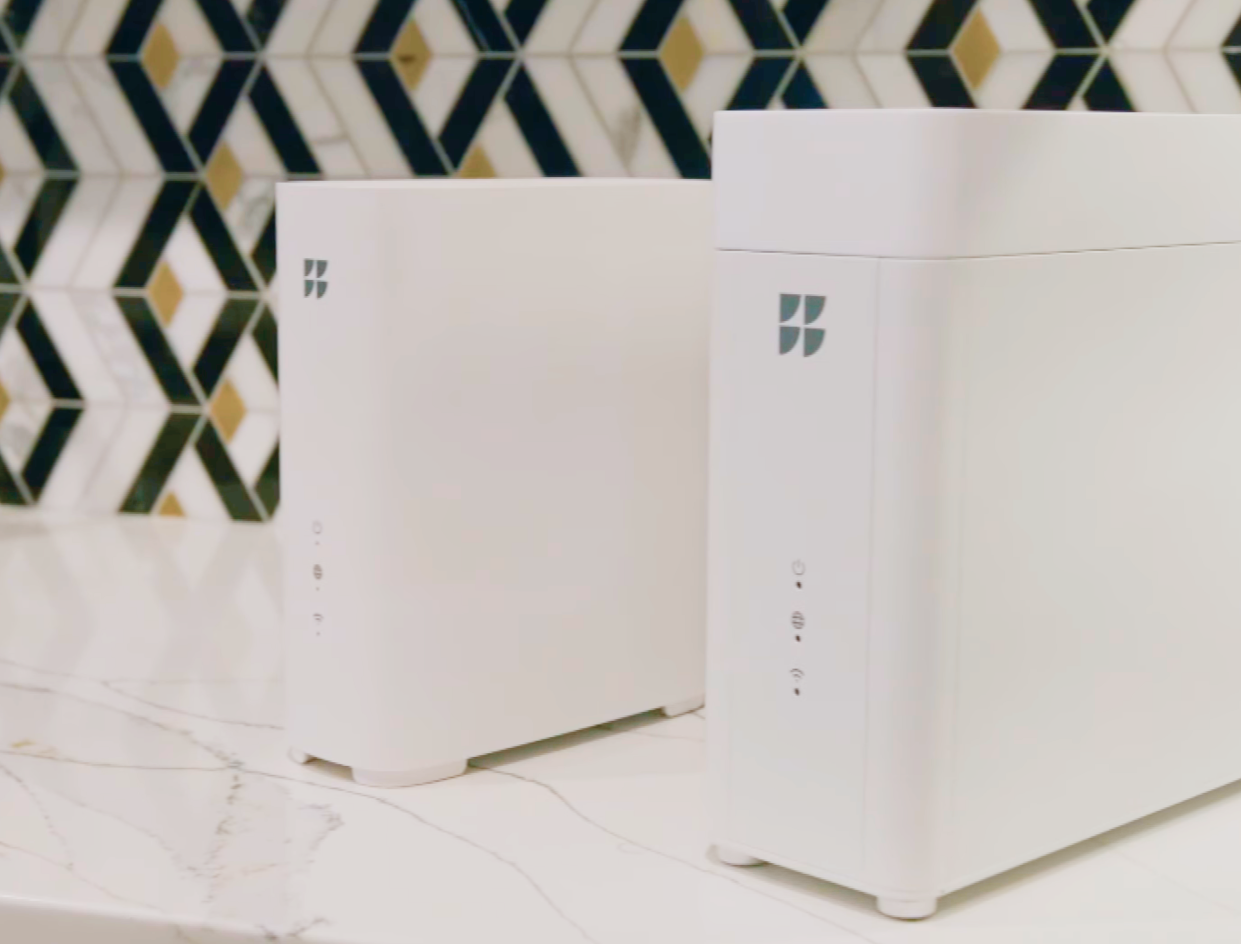
Once you have a plan for your 20 Gig equipment, you’ll be able to make an installation appointment. During that appointment, a GFiber technician will come to your home and set up everything according to the plans you made during your consultation. They’ll bring all of the equipment you need to get started with 20 Gig, including a Wi-Fi 7 Router, a Mesh Extender, power adapters, and a Cat6A Ethernet cable.
First, the technician will install a 3M Low Profile Wall Plate — this is where 20 Gig service enters your home.
Next, they’ll set up an Optical Network Terminal (ONT) to convert the incoming fiber signal. Your ONT must be attached to a rack, which can be wall-mounted or free standing. It’s helpful if you have a media closet or a rack already installed in your home, but if you don’t have one, we can provide a rack to mount your ONT either horizontally or vertically.
However, it’s preferred that you provide your own mounting equipment for the ONT, which should meet the following specifications:
- When the ONT is placed horizontally in a rack, the forced airflow is from left to right.
- At least 2 inches (50 mm) of clearance should be reserved at both the inlet and outlet of the ONT to ensure that the airflow is not blocked.
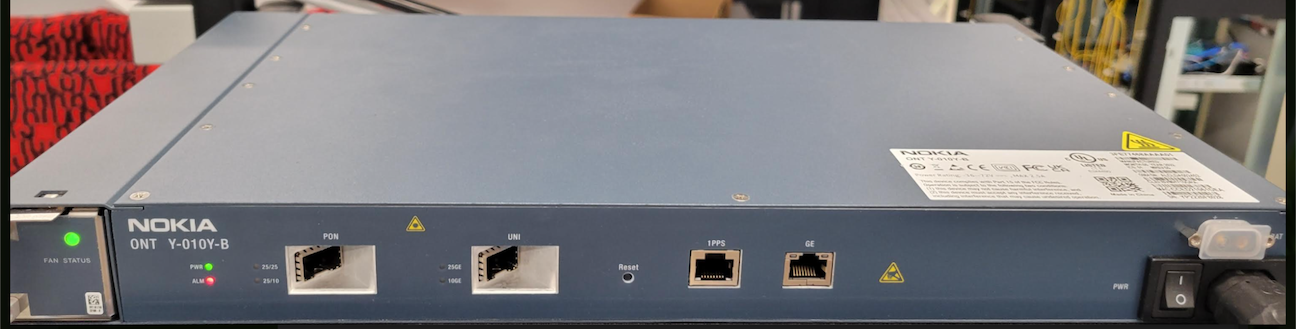
An Optical Network Terminal (ONT)
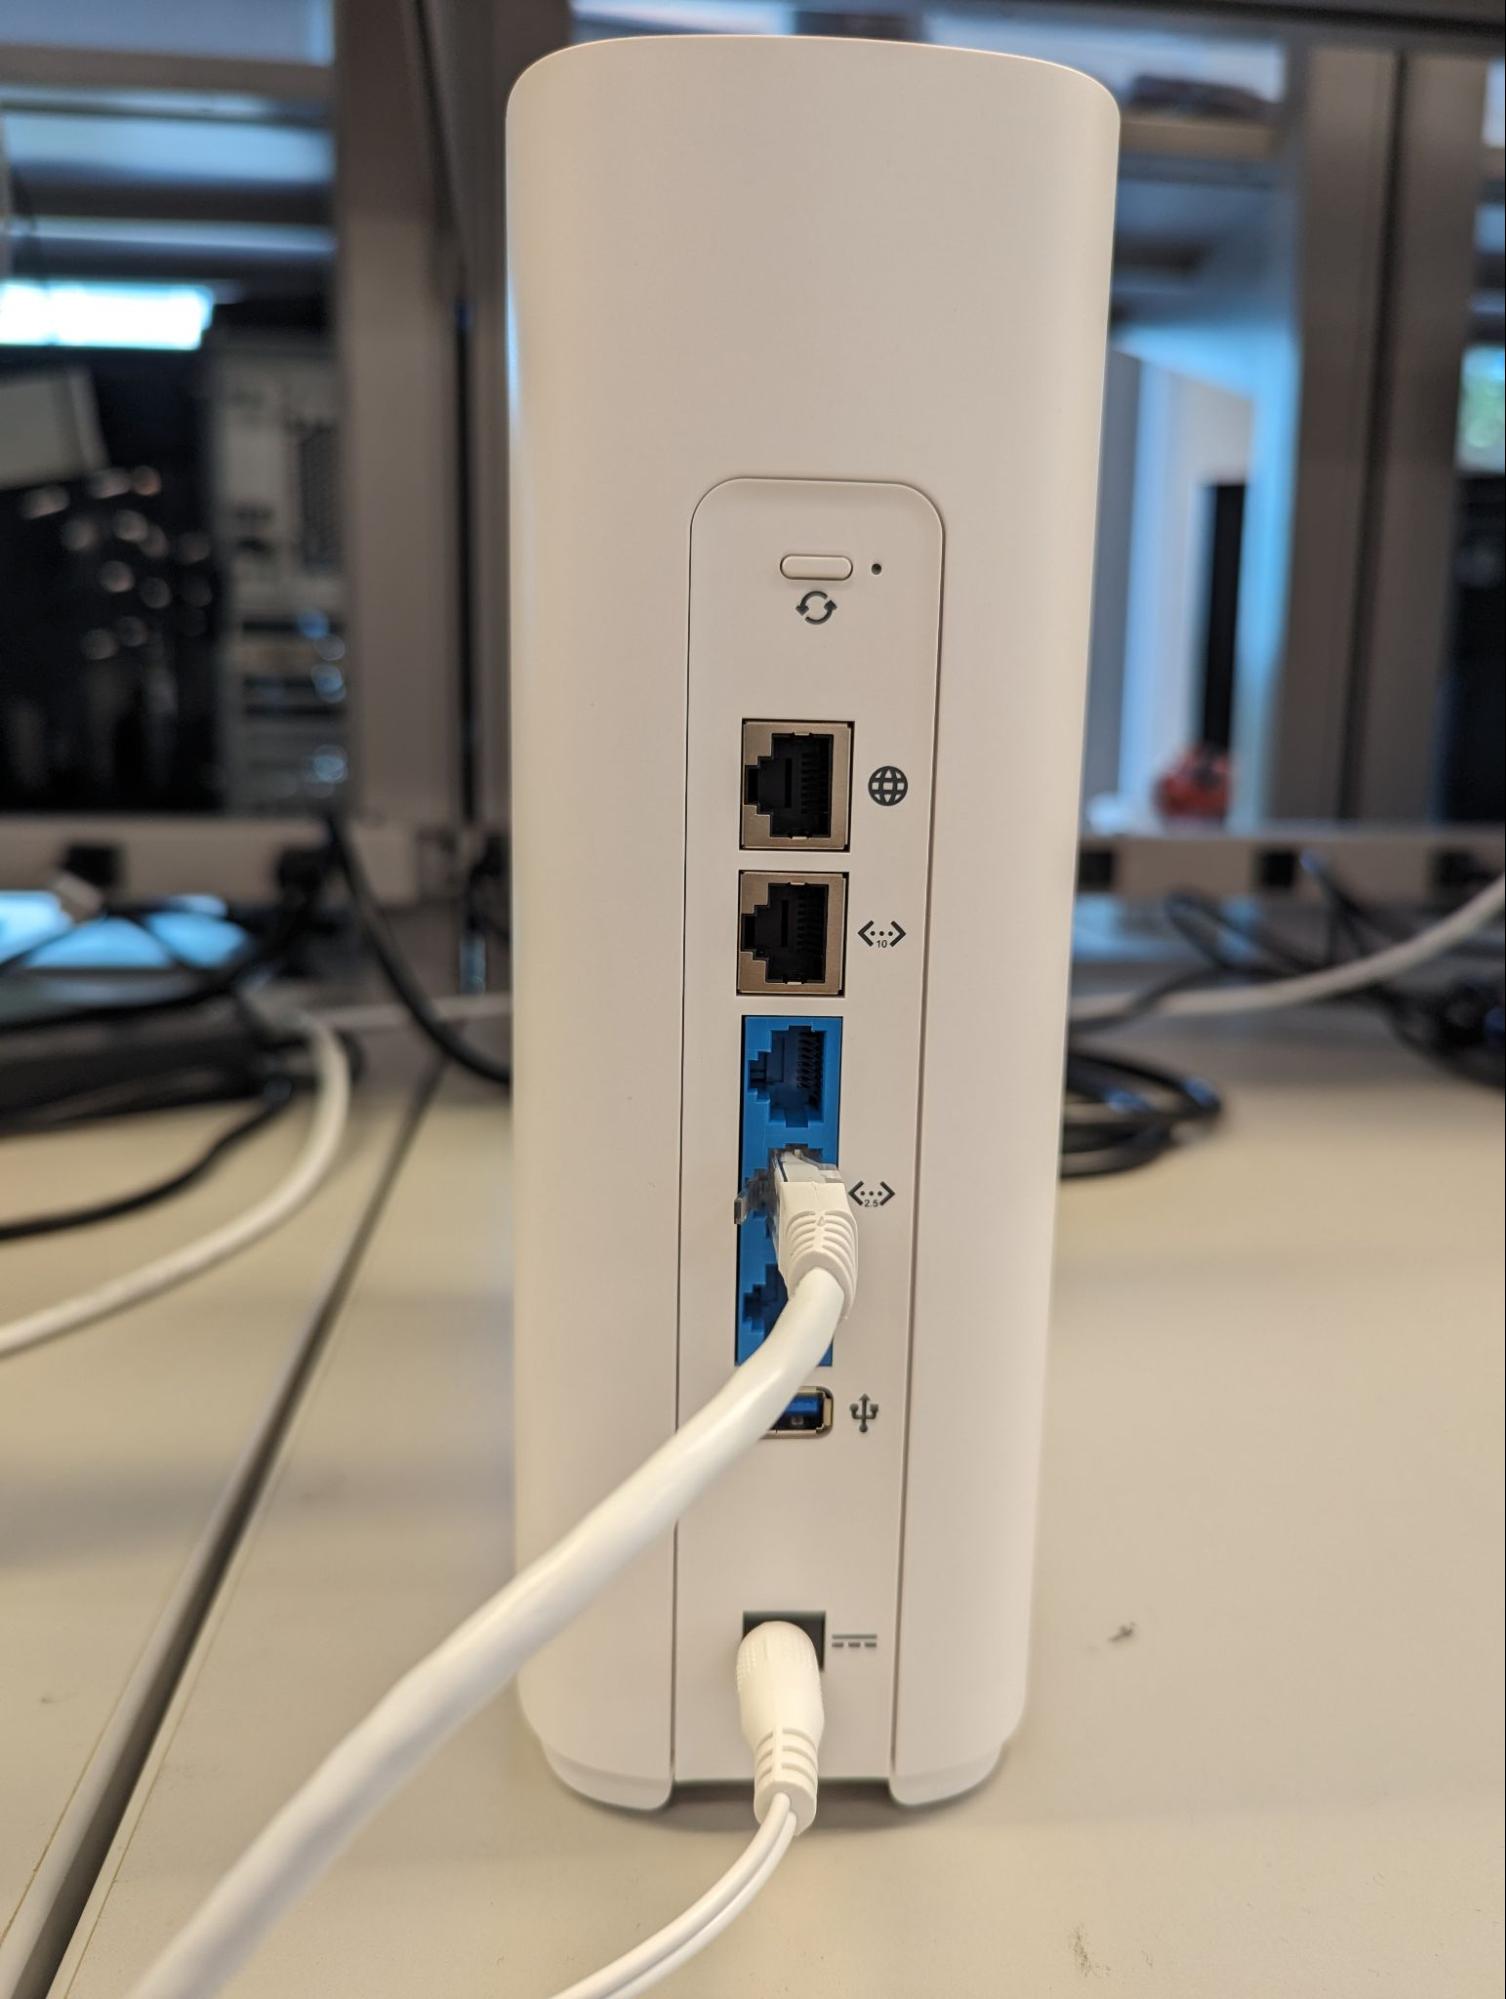
Finally, the technician will set up your Wi-Fi 7 Router and Wi-Fi 7 Mesh Extender. You may use the Wi-Fi 7 Router that we provide, or you can use your own router — as long as it includes a 25G WAN SFP28 port and multi-gig LAN ports.
| Wi-Fi |
|
| Security |
|
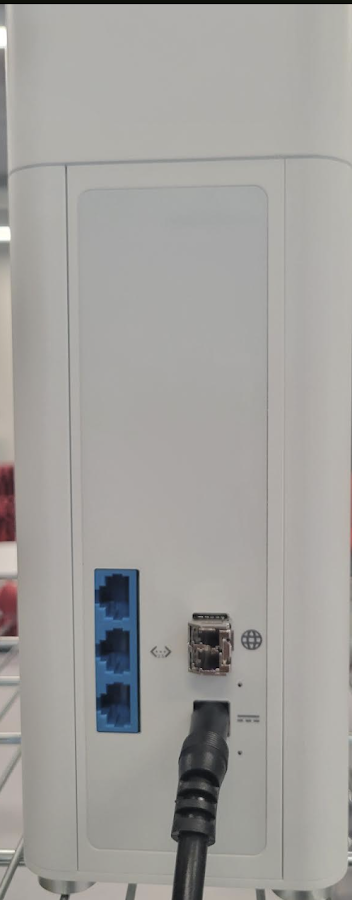
| LAN interfaces | (3) x 2.5 Gig Ethernet port |
| Wi-Fi Range | Up to 2,000 sq. ft |
The Wi-Fi 7 Mesh Extender (GRBE330C) pairs with the Wi-Fi 7 Router to expand the Wi-Fi coverage area in your home even further. During your installation appointment, the technician will check your Wi-Fi coverage to determine the best placement for your Wi-Fi 7 Mesh Extender in your home.
Some other things to note:
- Only the Wi-Fi 7 Mesh Extender from GFiber will be compatible with the Wi-Fi 7 Router (you cannot provide your own).
- One Mesh Extender is provided for free with your Wi-Fi 7 Router installation.
- If you wish to use your own router, you may unplug the GFiber Wi-Fi 7 Router and Extender and plug your compatible equipment directly to the 20 Gig ONT.
Wi-Fi 7 Mesh Extender Technical Specs
|
Wi-Fi |
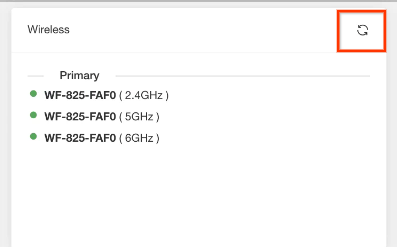
Tri-band (2.4 GHz, 5 GHz, and 6 GHz) |
|
LAN interfaces |
|
|
Wi-Fi Range |
5,000 sq ft when combined with the Wi-Fi 7 Router |
Some other things to note:
- While the Wi-Fi 7 Router and Mesh Extender are designed to provide multi-gig speeds to Wi-Fi 7 devices, they’ll also bring applicable peak speed to any Wi-Fi 6E or older generation devices.
- Your Wi-Fi 7 Router and Mesh Extender are also designed to provide simultaneous multi-gig Wi-Fi throughout your home in order to maximize your 20 Gig connection. If you wish to have the full up-to-20-Gig-speed on one single device, you’ll need to purchase a retail router or switch that supports both 25G WAN and LAN configurations.
How to restart your router and extenders
- Unplug the router from the power outlet for at least 10 seconds.
- Plug it back into the power outlet.
-
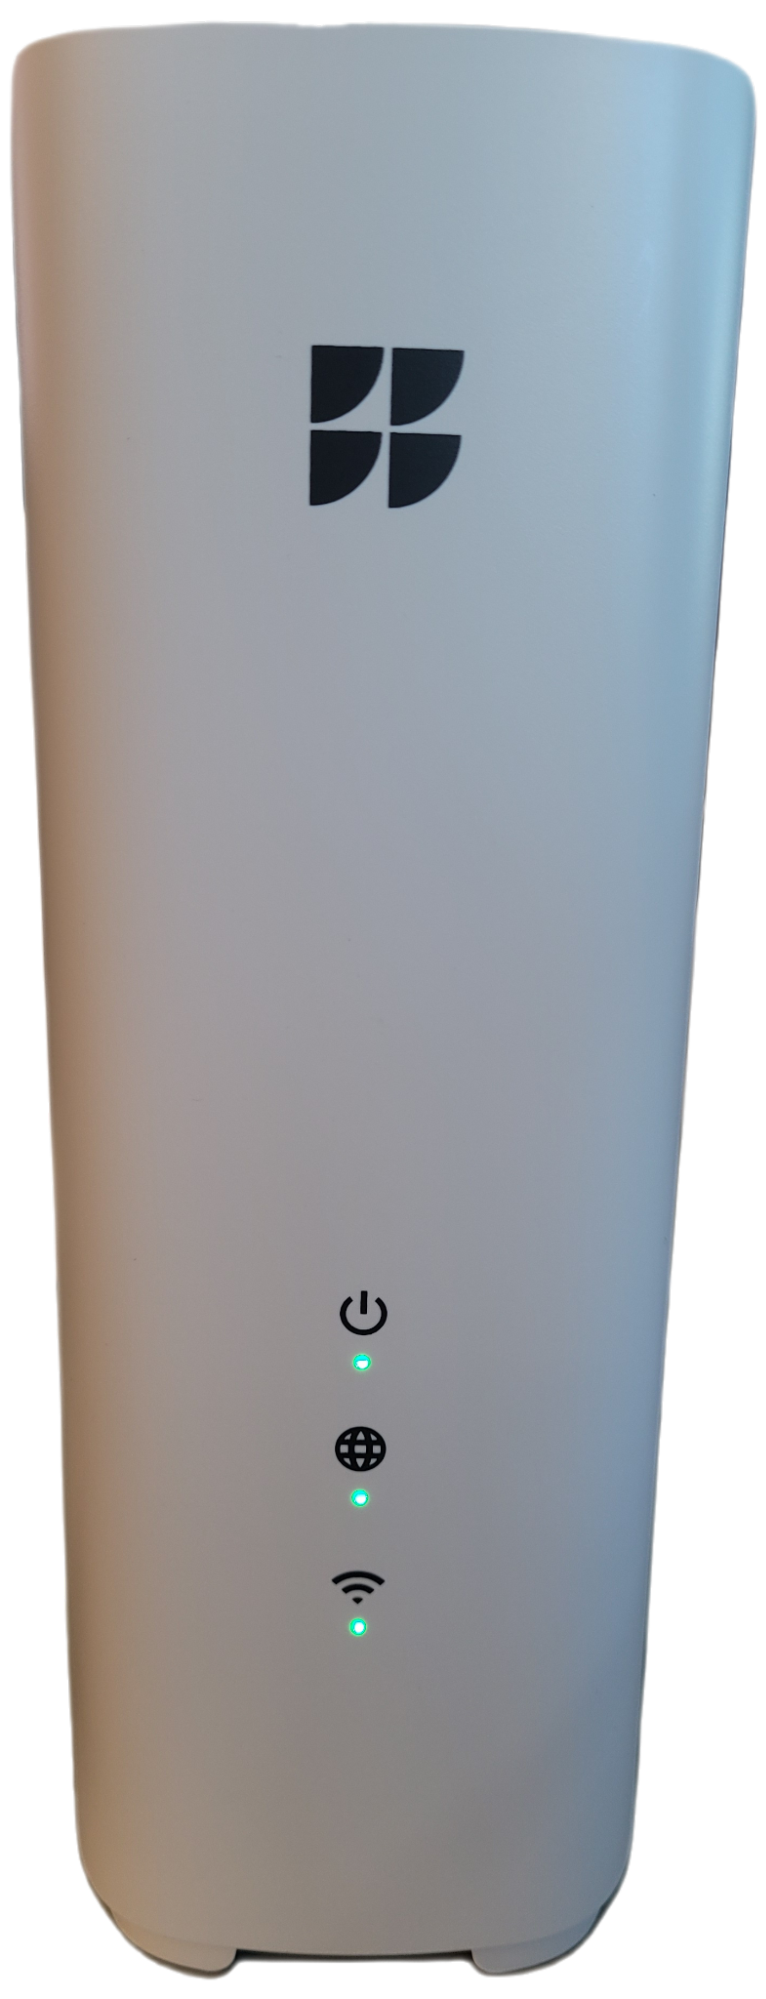
The router’s power, WAN/Internet, and Wi-Fi LED lights will all turn solid green to indicate a successful reconnection.
-
Repeat the same steps for the Wi-Fi Mesh Extender, if you have one.
How to re-pair your Mesh Extender
-
Wireless re-pairing:
-
Turn on the Mesh Extender 3 to 6 feet away from the router and wait for the Power LED to turn from blinking green to solid green, which indicates that it’s ready to pair. This can take up to 3 minutes.
-
Log in to the router from a web browser (we recommend using a desktop or a laptop). You can log in by entering https://192.168.1.1 in the address/URL bar of the browser.
-
Click the WPS icon on the screen, then press the physical WPS button on the back of the Mesh Extender. The WPS light on the Mesh Extender will blink green. Then, when the pairing is successful, the WAN/Internet and Wi-Fi lights will turn solid green (this can take up to 4 minutes).
-
Unplug the Mesh Extender from the power outlet and move it halfway between the Router and the area with poor Wi-Fi signal. Turn the power back on. The Mesh Extender’s power, WAN/Internet, and Wi-Fi LED lights will all turn solid green.
-
If the Mesh Extender shows solid red LED lights, move it a little closer to the router and try again.
-
-
Wired re-pairing
-
If you’re not able to get a successful wireless connection between the Wi-Fi 7 Router and Mesh Extender after a few attempts, you can connect the two devices using a Cat6A Ethernet cable (the technician who installed your 20 Gig service should have brought this to your installation appointment).
-
Turn on the Mesh Extender 3 to 6 feet away from the router and wait for the Power LED to turn from blinking green to solid green, which indicates that it’s ready to pair. This can take up to 3 minutes.
-
Connect the ethernet cable from the router’s blue LAN port to the Mesh Extender’s blue LAN port. Wait for the WAN/Internet and Wi-Fi LED lights to turn solid green, which indicates a successful pairing.
-
Unplug the Mesh Extender from the power outlet and move it halfway between the Router and the area with poor Wi-Fi signal. Turn the power back on. The Mesh Extender’s power, WAN/Internet, and Wi-Fi LED lights will all turn solid green.
-
If the Mesh Extender shows solid red LED lights, move it a little closer to the router and try again.
-
How to perform a soft factory reset
You can perform a soft factory reset of your Router and Mesh Extenders through your local web log-in. Navigate to https://192.168.1.1/#/index and click on the “Settings” icon in the top right. Next, click on System -> Reset Network, then select “Reset Network Settings.”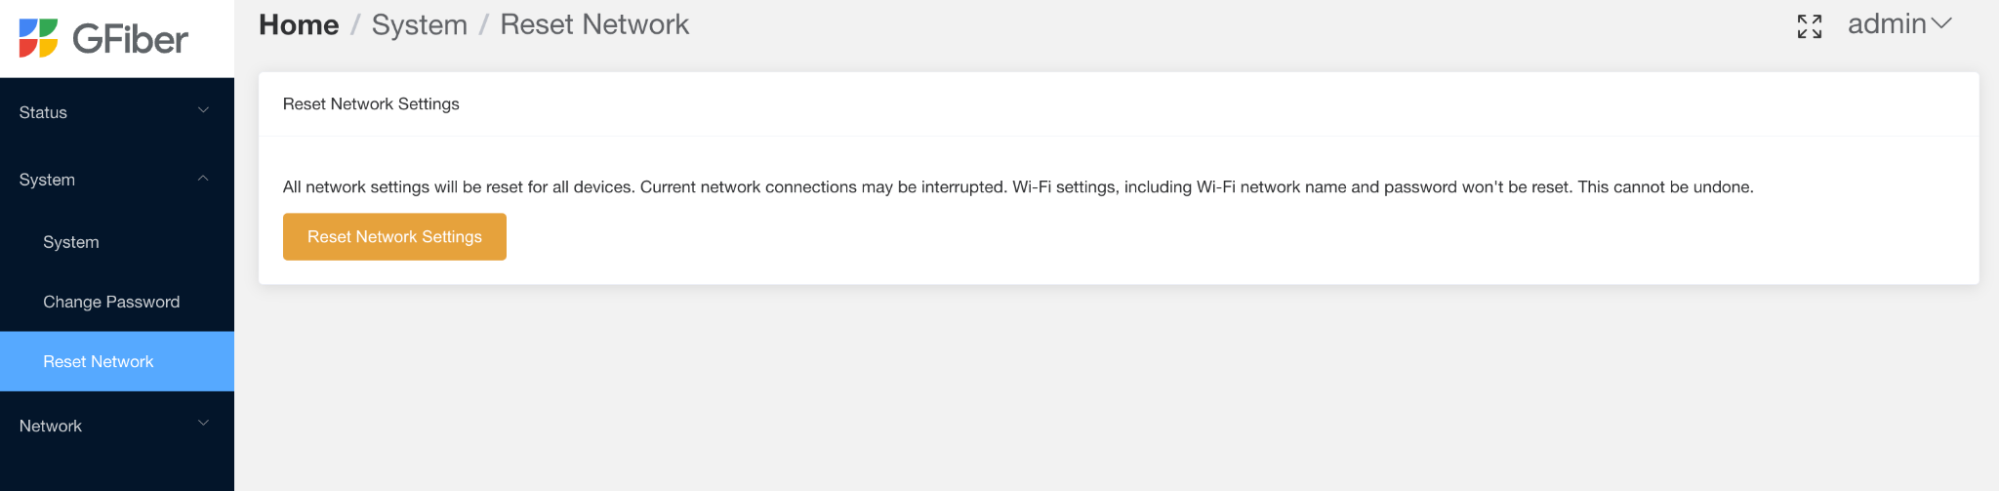
How to perform a hard factory reset
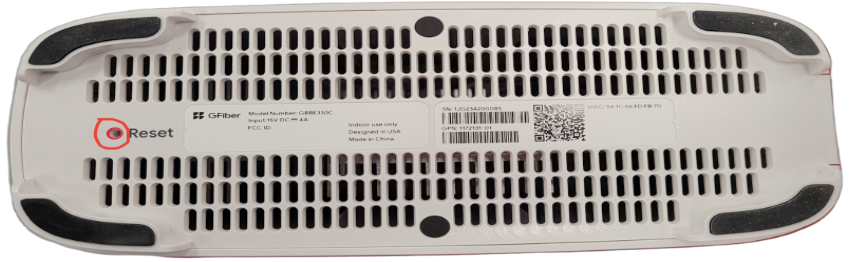
If none of the steps above work, you can try performing a hard factory reset on your Wi-Fi 7 Router and Mesh Extender. Use a pin or similar implement to push the highlighted buttons (see below) for at least 10 seconds. This will restore all settings to their factory default, including your Wi-Fi network name and password.
The pinhole on the Wi-Fi 7 Router looks like this: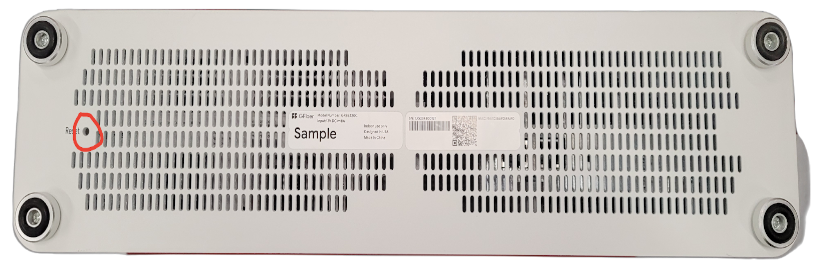
After you finish resetting your router and extenders, you’ll need to reconfigure your network settings and re-enable Wi-Fi, including re-pairing Wi-Fi 7 Mesh Extender. To get started, connect to the Wi-Fi 7 router with the CAT 6A ethernet cable (in blue LAN port) and navigate to https://192.168.1.1/#/index and click on the “Settings” icon in the top right.
If you’ve tried the steps above and the issue still persists, please contact us.