Installation Process for New Customers
If you’ve chosen a professional installation (or “pro install”) for your new GFiber service, this article will walk you through the process step-by-step and share information on how to prepare for your in-home install. Find out more about what to expect as we get ready to connect you to GFiber service tailored to your needs.
If you selected a self install for your GFiber service, you can find more information here.
Watch this 3-minute video to see the full GFiber installation process:
Step 1: Sign up for Service
When you sign up for GFiber service and select a pro install, you’ll be asked to schedule an in-home install (or “installation appointment”) during which a GFiber technician will come to your home to install your router and any necessary mesh extenders.
Prior to in-home install, GFiber crew members will do some work on the exterior of your property to connect your home to our network. You can expect these activities to take place in the week or so leading up to your in-home install appointment.
A few important action items in the meantime:
-
Download the GFiber App to confirm or change your appointment and track your technician on the day of your in-home install.
-
Don’t cancel your existing internet service until a GFiber technician has completed the in-home install and confirmed that your service is active.
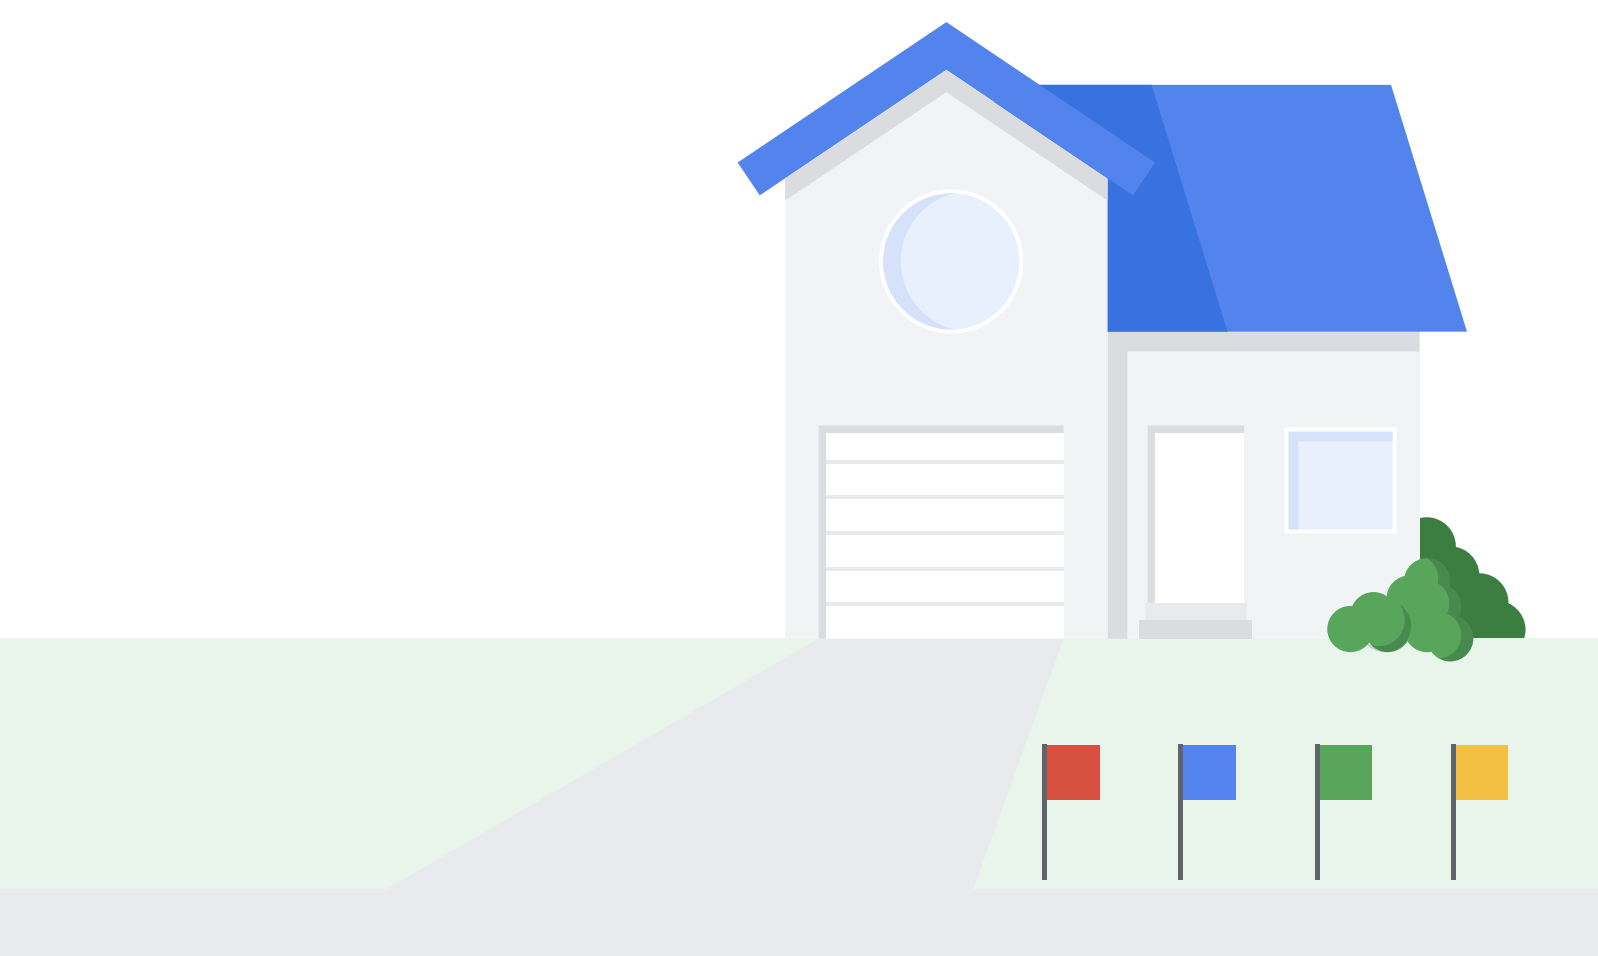
Step 2: Utility Line Marking
Before we install your GFiber service, the existing underground utilities on your property need to be marked to ensure safety and prevent damage to existing utilities or your property (except in Texas*, you can find more information about this below).

Because independent companies assigned by the 811 association—not GFiber—conduct utility line marking, we cannot provide an exact timeline for completion. If marking is not finished before your scheduled appointment, we will contact you by phone and send an email to reschedule.
Some important things to know:
- Utility line marking personnel may need access to your yard. They will typically knock on your front door before entering your yard. If you are not home and your yard is accessible, they may proceed with the utility marking process.
- If you have any personal in-ground installations on your property (e.g. invisible dog fences, sprinkler systems, etc.), we recommend you mark them with flags or spray paint yourself to help prevent any accidental damage to these systems.
Not sure where your sprinkler lines are? Look at how your sprinkler heads are arranged. Pipes typically run straight between heads, but please verify your exact layout.
* In Texas, standard GFiber installations typically do not require utility line marking because we are not digging below the minimum depth for other utility lines. However, marking may be necessary in certain situations.
Step 3: On-Property Prep
Once the utility line marking is complete, our team will begin the on-property preparation work. This phase involves several steps and may take a few days to complete:
-
Confirming utility line marks: Our team will first verify that all underground utilities on your property have been accurately marked.
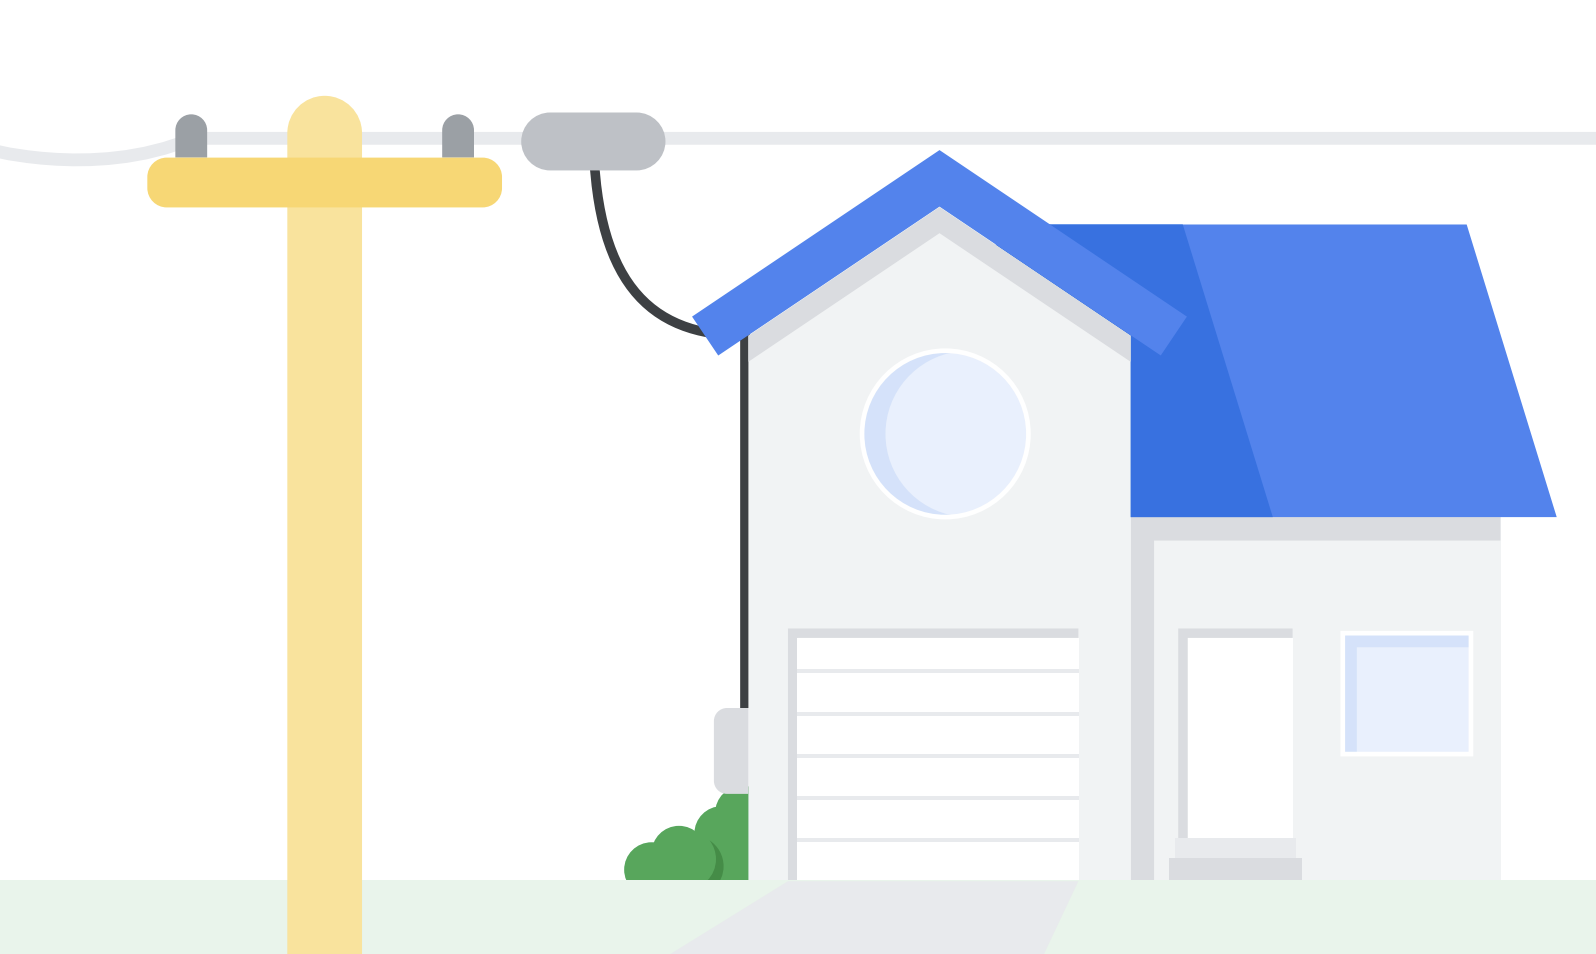
- Running the fiber line to your home and installing the Network Interface Unit [NIU]:
- Running the fiber line to your home:
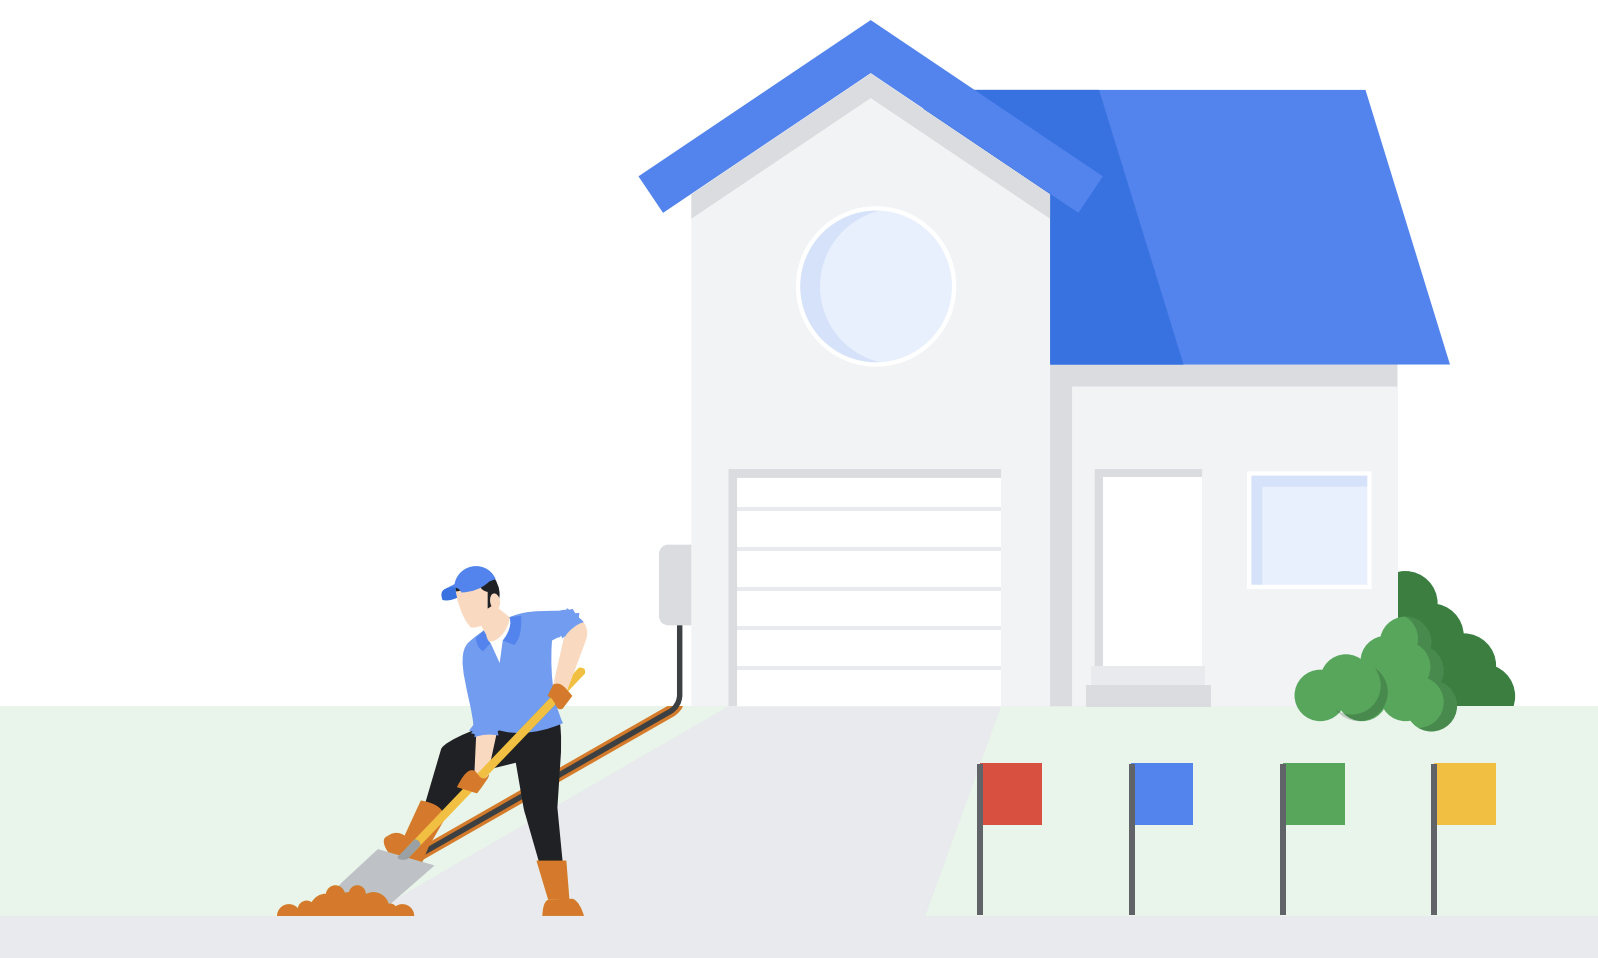
- Underground installation: In most cases, the fiber optic cable will be buried underground*. Our team will carefully dig a trench and lay the cable from the curb to your home. We’ll use the most appropriate method for your property — either hand digging, using trenching equipment, or boring underneath driveways or hardscapes.
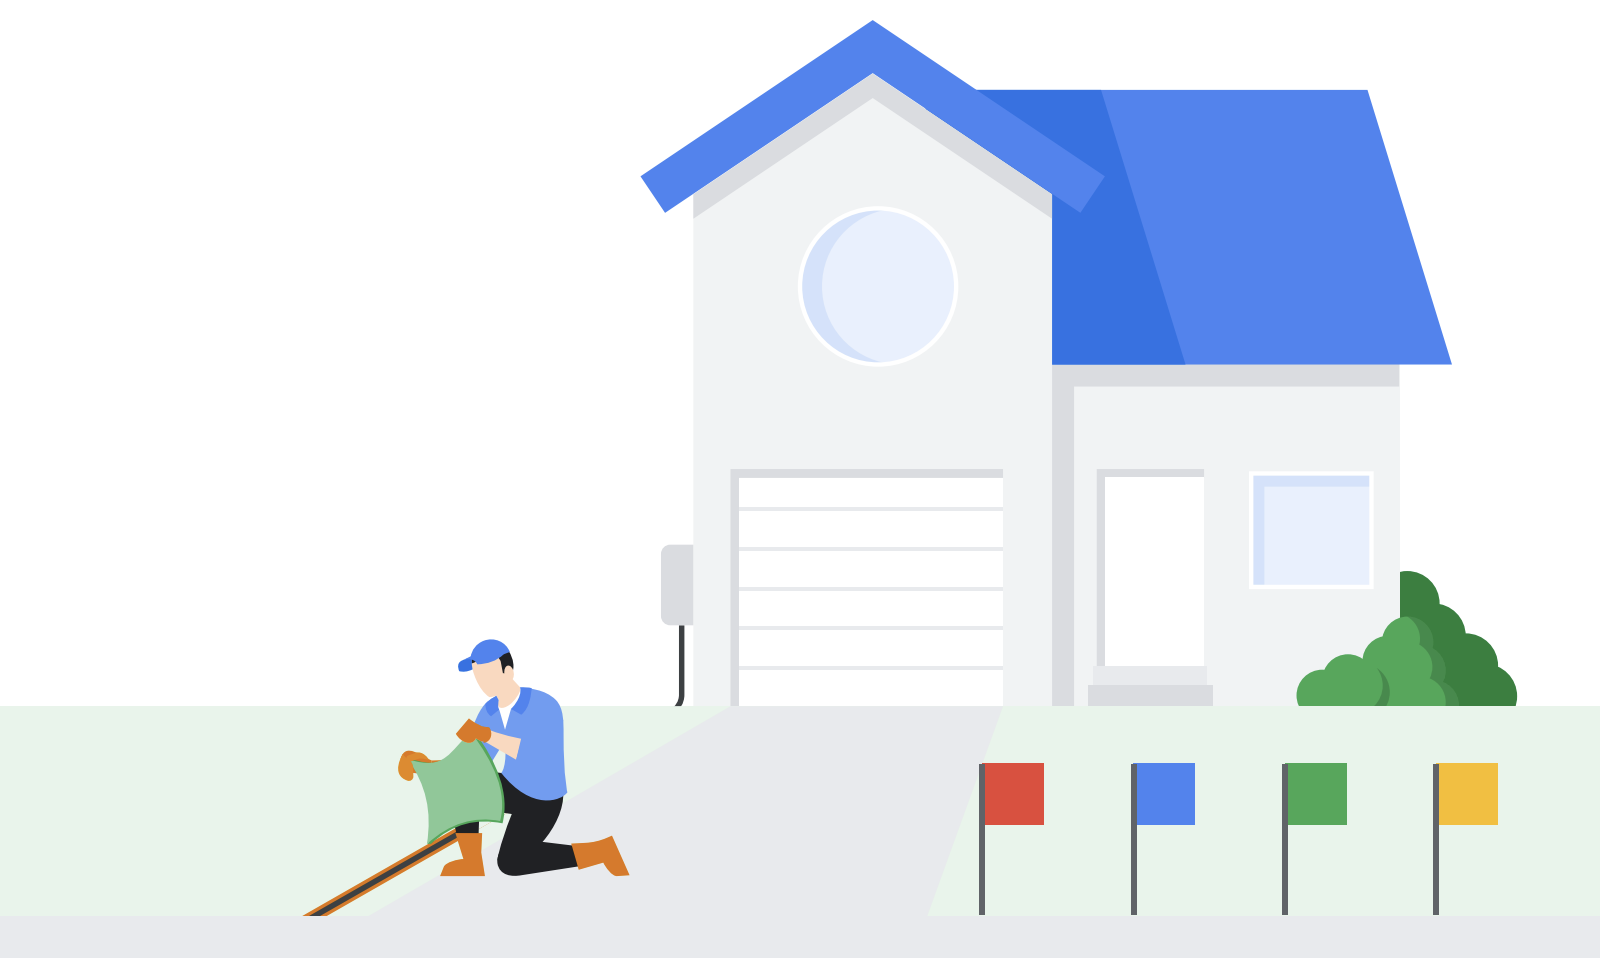
*Note: In some instances, we will have to lay a temporary drop on the ground until ground conditions allow us to bury it. For these customers, our team will take care of steps 2 through 4 during your on-site install appointment. - Aerial installation: Depending on your property and how our fiber optic network is deployed in your area, the team may string your fiber optic cable from utility poles to your home.
- Underground installation: In most cases, the fiber optic cable will be buried underground*. Our team will carefully dig a trench and lay the cable from the curb to your home. We’ll use the most appropriate method for your property — either hand digging, using trenching equipment, or boring underneath driveways or hardscapes.
- Installing the Network Interface Unit (NIU): A small grey box called a NIU will be installed on the side of your home. This is where the GFiber optic network connects to your home. We’ll carefully select the best location for the NIU, typically aiming to place it near existing utilities, and drill a small hole in the exterior of your house to bring fiber into your home.

- Running the fiber line to your home:
- Connecting the network: A technician will then connect (or “splice”) the fiber optic cable. This activates the signal within the cable.

Curious how it works? There is no electrical current that flows through a fiber optic cable. Instead, it transmits data using pulses of light, meaning it carries no electricity and is considered non-conductive. When the fiber optic cables are spliced, the signal is activated from the GFiber fiber network to the NIU on your house. - Validating the fiber optic signal: The technician will perform validations of the signal and light levels, and we will conduct remote validations as well. A crew may visit your home for additional checks if needed to ensure the strongest fiber optic signal.
Step 4: In-Home Install
Once the exterior on-property prep work is complete, you’re ready for your in-home install. During this appointment, the technician will bring the fiber connection inside your home, install your equipment, and ensure your Wi-Fi and wired internet connections are working properly.
Preparing for your installation appointment
To ensure a smooth in-home install, please:
- Ensure someone 18 years or older is present at your home during the entire appointment.
- Have access to the email address and password you used to sign up for GFiber service.
- Clear the area where the GFiber technician might be working. This will most likely be close to the NIU, in your office, or the rooms that matter most for your internet connection.
- Download the GFiber app from the Google Play Store or the Apple App Store. You can use the app to make changes to your appointment, add your installation appointment to your calendar, and track your technician’s arrival on the day of your installation.
Day of appointment
- Confirmation: The technician will confirm the fiber line is properly installed, the outside equipment is connected and working properly, and that you or someone over 18 will be home during the entire appointment. If your technician cannot confirm these conditions, you will need to reschedule your appointment. You can easily reschedule in the GFiber App.
-
Fiber Jack placement: The technician will work with you to find the best location inside your home for the Fiber Jack. This small device connects the fiber optic signal from the NIU to your home’s internal network.Curious how it works? The Fiber Jack converts the optical digital signal (light) from the fiber optic cable into an electrical signal that your devices can use.
-
Equipment installation: The technician will install your new GFiber router along with any other equipment included with your GFiber service, such as a mesh extenders or phone equipment. Your technician will show you how to use them and make sure everything is working correctly.If you signed up for Home 3 Gig or Edge 8 Gig and added features like Priority Room Optimization or Internet Battery Backup, the technician will configure those as well.
-
Network validation: The technician will conduct thorough tests to make sure your network is configured and performing at its best. GFiber will also conduct a battery of diagnostics remotely to ensure optimal performance.Download the GFiber App to run a speed test anytime and keep an eye on your network’s performance.
- Speed test: Take this time to check out the performance yourself. Visit speedtest.net for an independent check of your new speed and latency.
FAQs
-
Exterior preparation: This phase can take anywhere from 1-2 weeks, depending on your location, the specific requirements of your property, and scheduling with utility marking companies. You do not need to be home for this part of the process.
-
In-home install: Your installation appointment typically takes around two hours from the time your technician arrives and someone 18 years or older needs to be present for this step.
During the pro install process, we will be digging a trench up to nine inches deep to install a fiber optic cable from the curb or green space in the right-of-way to connect our network to your home.
GFiber works with specific construction partners to preserve the safety and integrity of our fiber network. If you hired an independent contractor, GFiber would have to give them access to proprietary network equipment. Your contractor would need access to the GFiber network access points (NAPs) and would need to splice the connected wires.
This is a high-risk activity; if a mistake is made, it could knock out service for your entire block or an even larger area. Additionally, an independent contractor would not be able to troubleshoot any GFiber connectivity issues.
Before beginning any installation work, we follow all necessary safety protocols, including contacting 811 to locate existing underground utilities. We don’t dig until a local authority marks existing lines*. If the rare instance where a utility line is mismarked or accidentally damaged during the installation process, we will immediately notify the affected utility company for repairs.
*Except in Texas, where standard GFiber installations typically do not require utility line marking because we are not digging below the minimum depth for other utility lines. However, marking may be necessary in certain situations.
To keep your neighborhood connected and avoid unexpected repair bills, always call 811 before you start a digging project.
- Get lines marked professionally: Calling 811 ensures experts come out to properly mark underground utility lines so you can dig safely.
- Don't rely on existing markers: Even if you see GFiber markers on your property, they may not show the exact location of the buried lines.
- Know your liability: If you dig without calling 811 first and damage a fiber line (or any other utility), you may be responsible for the repair costs.
We do our best to minimize any impact to your property and will always strive to restore your landscaping to its original condition. If you have any issues during the construction or installation process, please contact us.
If you need a different date or time for your in-home install, you can easily update it from your phone. Learn how to reschedule an appointment with the GFiber App.