Change Your GFiber Wi-Fi Network Name
Want a custom name for your Wi-Fi network? Update it in just a few steps using the GFiber App or your online account.

This feature is available for GFiber routers. If you’re using Google Wifi or Nest Wifi Pro, use the Google Home app to manage your network name.
Change Your Network Name in the GFiber App
Before you begin, download the GFiber App from the Google Play Store or App Store.
- Open the GFiber App and tap the Network tab.
- On your primary network card, tap the Manage button. (You can also get here by tapping Network settings, then Primary network settings).
- In the Network name field, enter your new name. Network names are case-sensitive and must be 1-32 characters long. Depending on your router, you may see separate fields for your 2.4 GHz, 5 GHz, and 6 GHz channels.
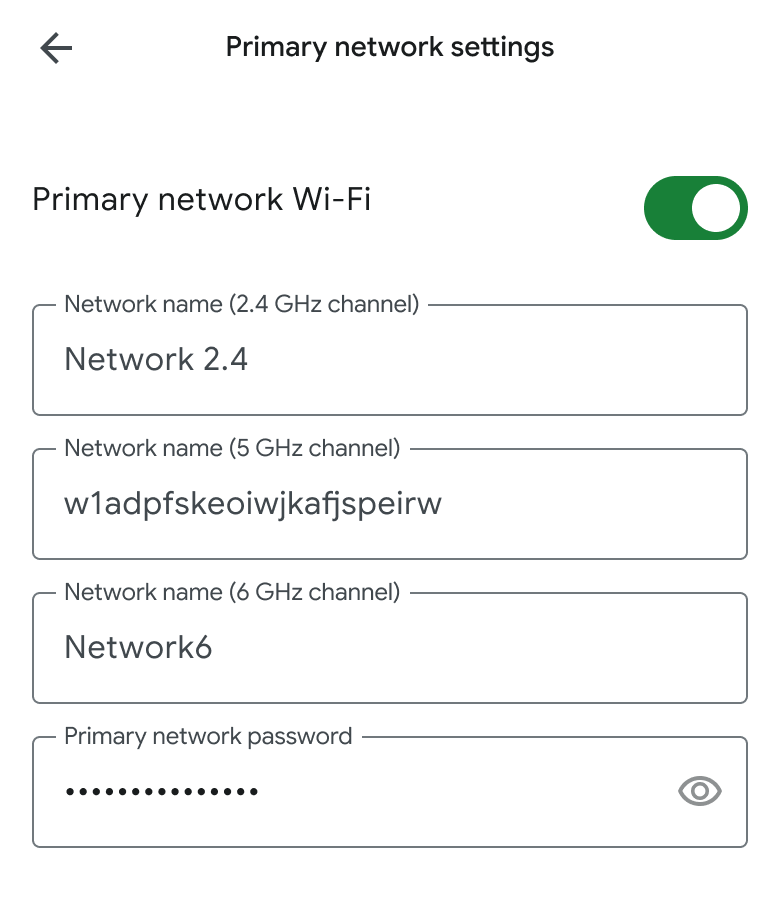
We recommend using the same name and password for all channels. This lets your router automatically connect your devices to the fastest available signal as you move around your home. Learn more about Wi-Fi bands and advanced network settings.
- At the bottom of the screen, tap the Save button.
Heads up: Saving your new name will restart your Wi-Fi. You’ll need to reconnect your devices using your new network name. Learn how to connect your devices.
Change Your Network Name in Your Online Account
- Sign in to your GFiber account.
- In the upper-left corner, click the Network tab. (If you don’t see it, open the navigation menu first).
- Click Edit network settings.
- In the Network name (SSID) field, enter your new name. Network names are case-sensitive and must be 1-32 characters long.
- Click the Save button.
Heads up: Saving your new name will restart your Wi-Fi. You’ll need to reconnect your devices using your new network name. Learn how to connect your devices.