Set Up Your GFiber Wi-Fi 7 Router
Depending on your home setup, you'll either use a self-install kit or get a professional installation during signup:
- Self-install: We ship a kit to your door, or you can pick one up at select GFiber locations when you place your order.
- Professional installation: A technician installs your equipment for you.
Follow the steps below to self-install your GFiber Wi-Fi 6E Router.
Quick Setup Guide

To install your GFiber Multi-Gig Wi-Fi 7 Router (Model GRBE331C):
- Power on your Fiber Jack.
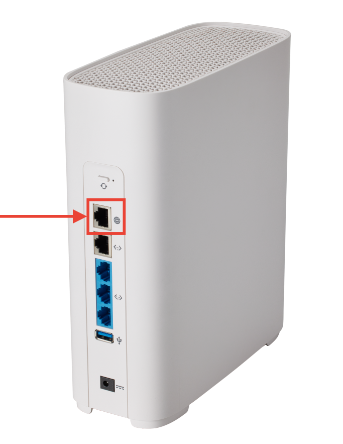
- Connect the Fiber Jack to your router’s silver WAN port (globe icon) with an Ethernet cable.
- Turn on your router.
- Set your Wi-Fi name and password in the GFiber App.
 Seeing a yellow Wi-Fi light? Finish setting up your network name and password in the GFiber App to get connected.
Total setup time: about 10–15 minutes.
Prefer to watch a video? See how to set up your Wi-Fi 7 Router.
What’s in Your Self-Install Kit
Open your self-install kit and confirm you have everything:
-
GFiber Multi-Gig Wi-Fi 7 Router (Model GRBE331C)

-
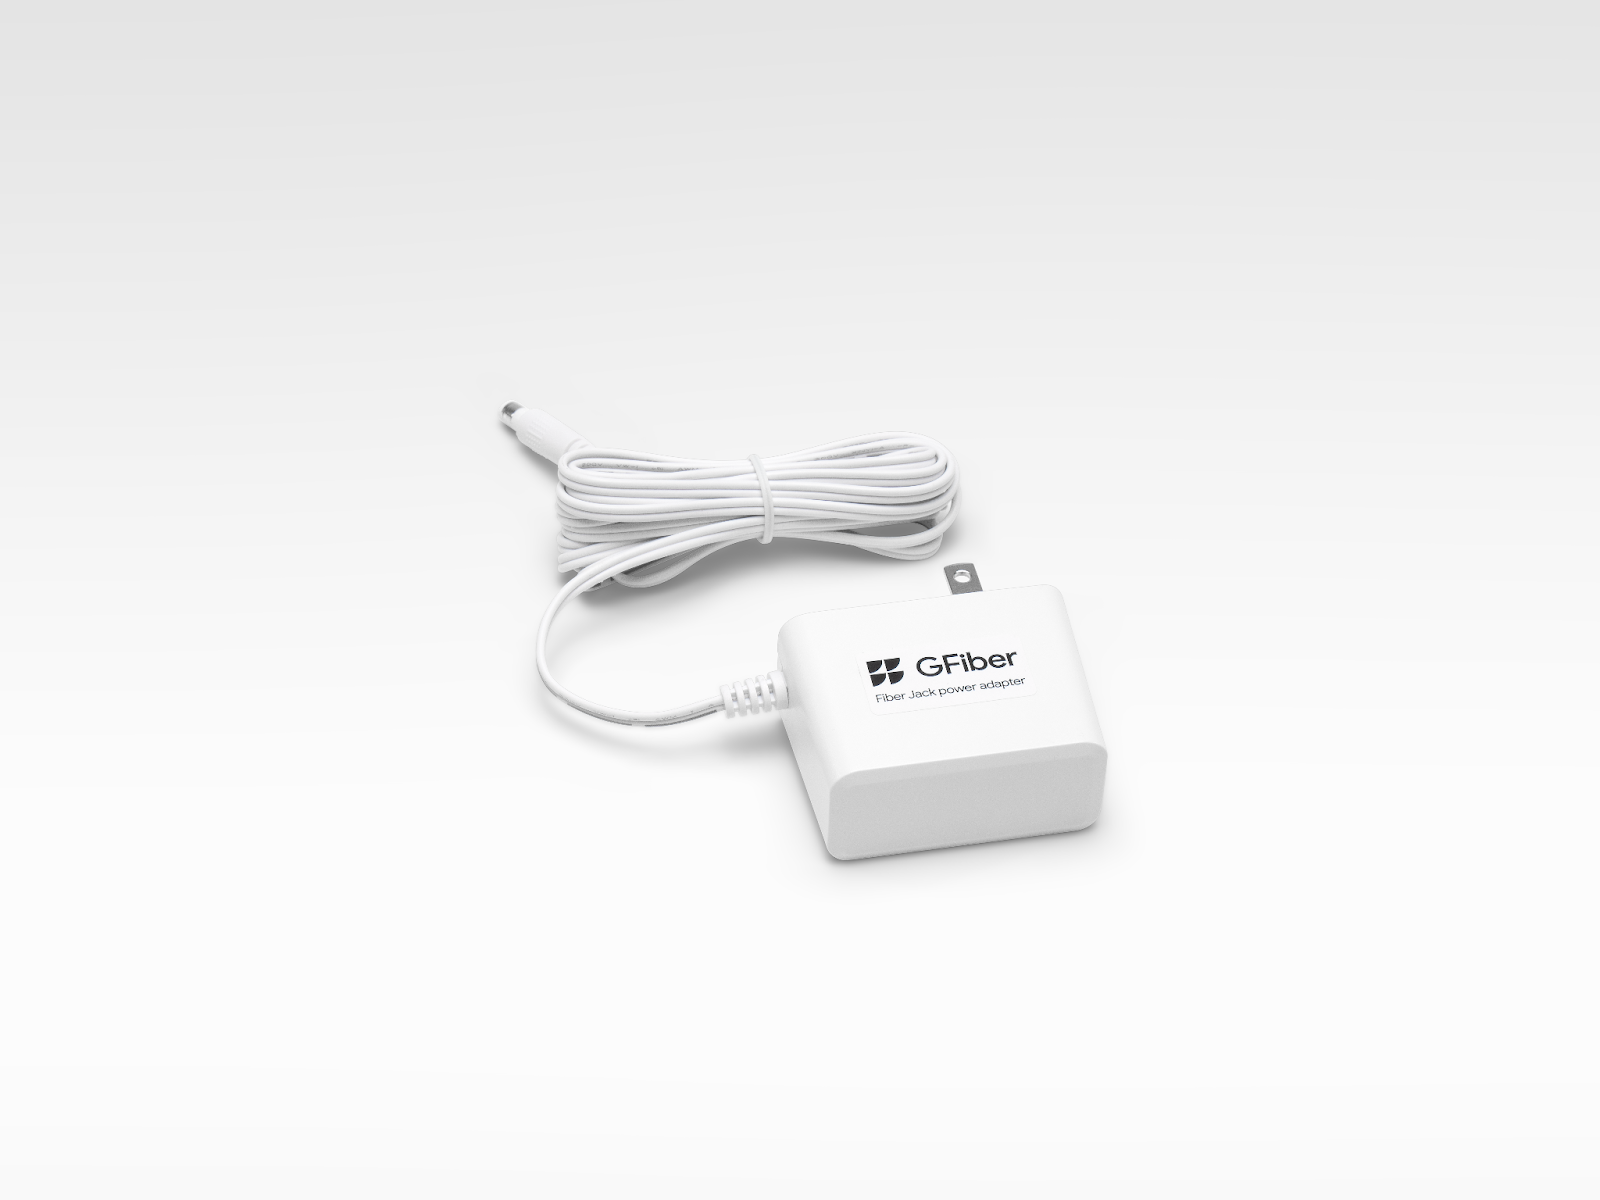
2 power adapters (one for the router, one for the Fiber Jack)
-
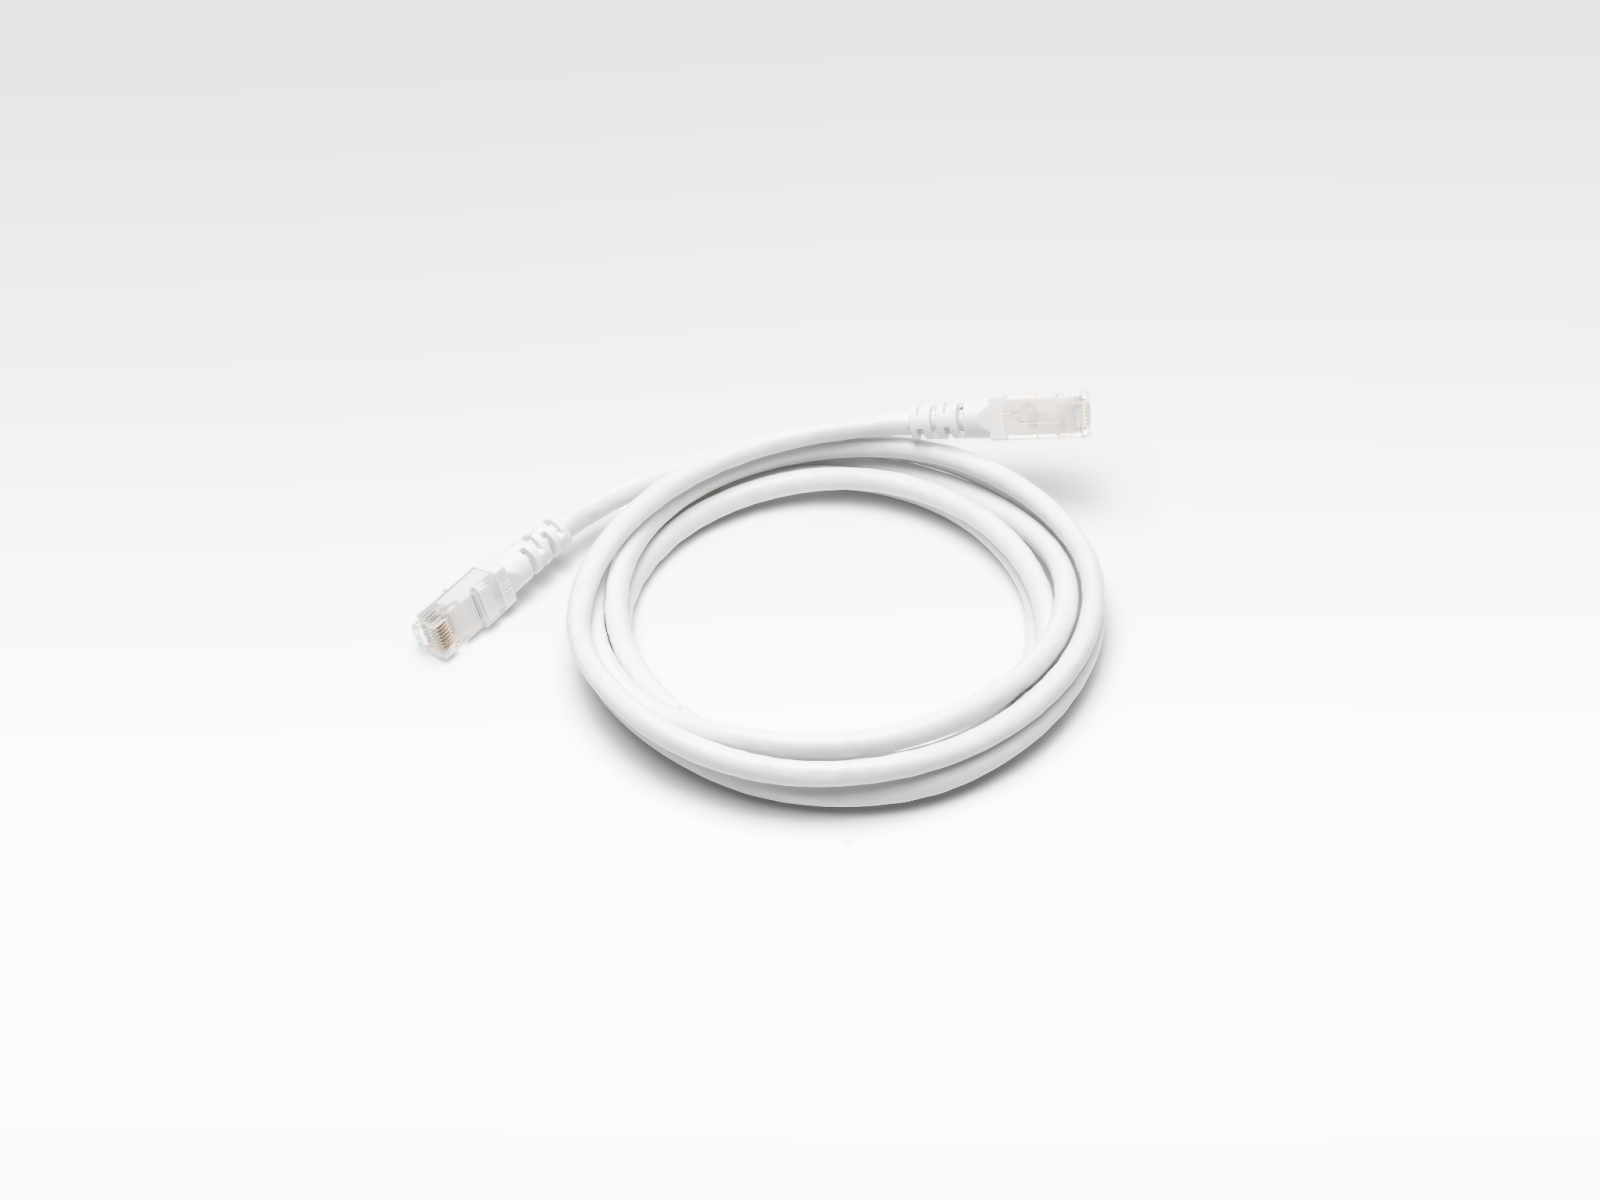
1 Ethernet cable
-
GFiber Wi-Fi 7 Mesh Extender (optional)
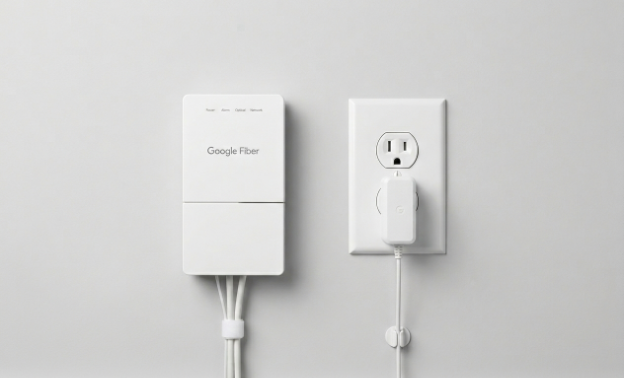
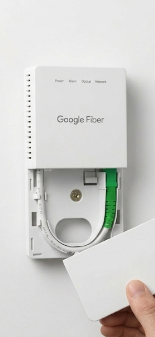
Step 1: Find the Fiber Jack
Your Fiber Jack is the small white box that connects your home to the internet. A technician may have installed this during your original appointment, or it could have been left there by a previous homeowner or tenant. Look for it on a wall, usually where the fiber line first enters your house through your NIU.
Check these common spots:
- Mounted on a wall in a central area or utility closet.
- Hidden inside a plastic media panel in a bedroom closet or behind the front door.
- Connected to an old router with an Ethernet cable.
There are two Fiber Jack models:
- Single-light model (blue lights)
- Four-light model (green lights)
Prefer to watch a video? See how to find your Fiber Jack.
If you still can't locate it, contact us.
Step 2: Connect the Fiber Jack to Power
To connect your Fiber Jack to power, follow these steps:
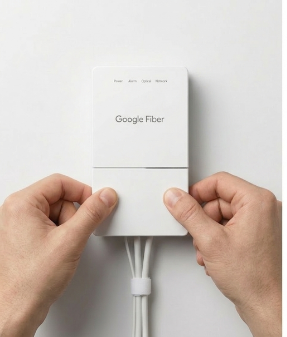
-
Remove the bottom cover of the Fiber Jack by placing your fingers in the side dents and gently pulling.
-
Check if the Fiber Jack is plugged in. If it is not, connect the power adapter from your self-install kit and plug it into a wall outlet.
-
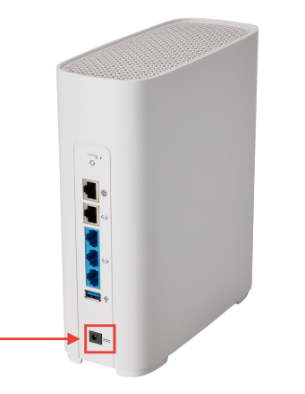
The Power light should start blinking. If it does not, press the Power button on the inside left side of the Fiber Jack.
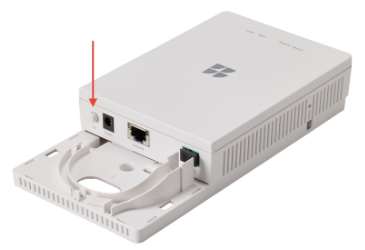
-
Wait for the light to turn a solid color before moving on.
Having trouble connecting? See our Fiber Jack troubleshooting guide.
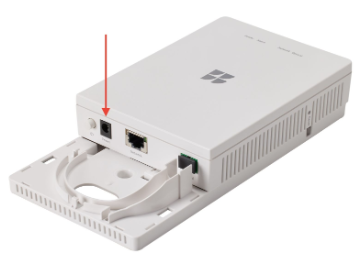
Step 3: Connect the Fiber Jack to Your Router
-
Plug one end of the Ethernet cable into the Ethernet port on your Fiber Jack.
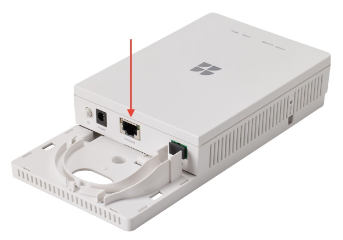
-
Plug the other end into the silver WAN port (globe icon) on your GFiber Wi-Fi 6E Router.
-
Connect the router’s power adapter to a wall outlet.
-
The light on the router may flash yellow or green while it connects. It will turn solid green once you’re online.
-
Slide the bottom cover of the Fiber Jack back into place.
You can do this in the GFiber App or your online account.
Using the GFiber Mobile App
- Sign in to the GFiber App.
- Tap Network at the bottom.
- Tap Network settings.
- Tap Primary network settings.
- If the Primary network Wi-Fi is set to Off, switch it to On.
- Update your Network name.
- Set a primary network password.
- Tap Save.
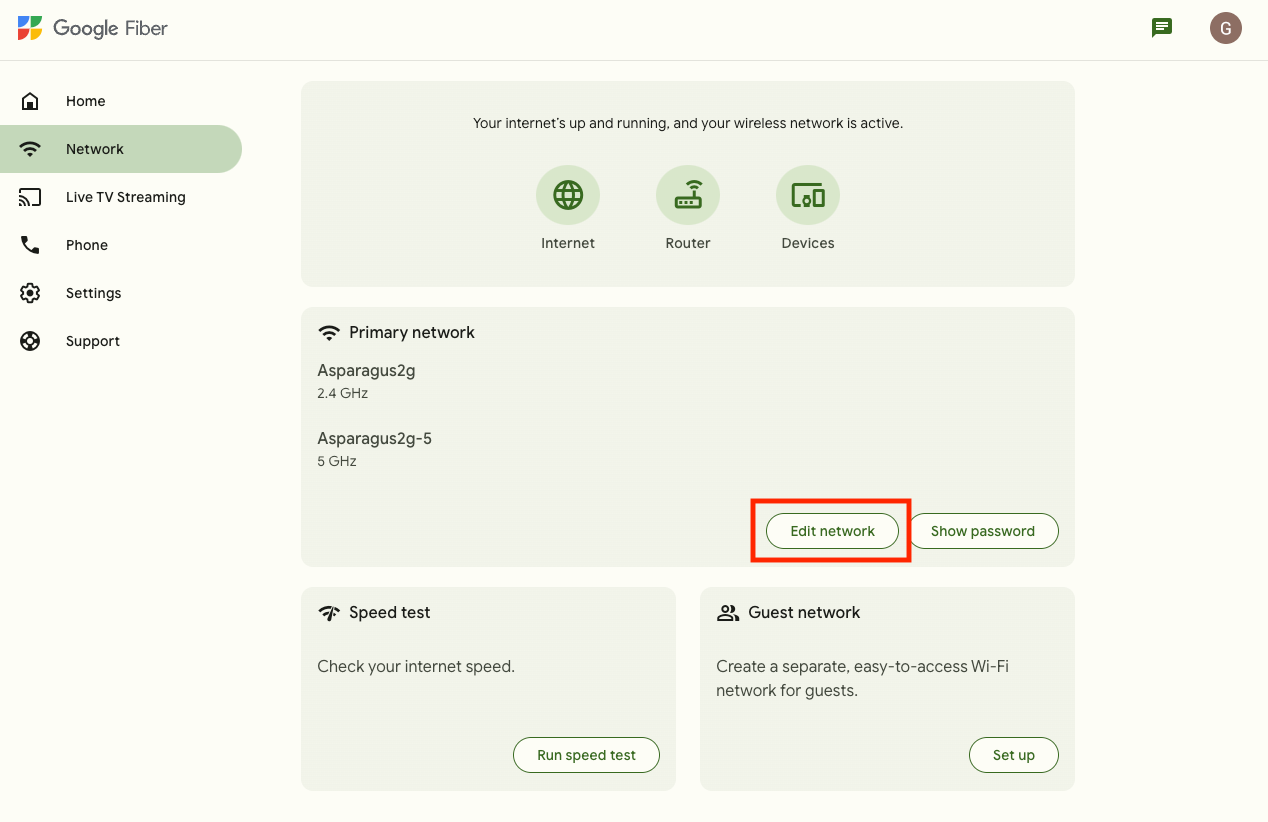
Using the GFiber Online Account Portal
- Sign in to your GFiber Account.
- Select Network at the top-left corner.
- Click the Edit network button.
-
If the Wi-Fi network is set to Off, switch it to On.
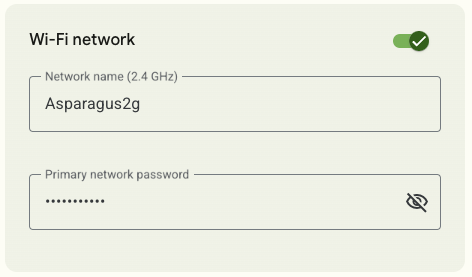
- Set a Network name.
- Set a Primary network password.
- Click Save.
A mesh extender helps your Wi-Fi reach every corner of your home.
- Start by setting up the extender close to your router — you can move it later.
- Follow the steps in our Mesh Extender setup guide.
- Once paired, move the extender about halfway between your router and the area where you need more coverage.
Router Light Status Guide
Light | Symbol | Meaning | Action |
Solid Green |
| Connected | You’re all set! |
Solid Yellow |
| Wi-Fi is turned off | |
Solid Red |
| No internet connection | Check your cables and reboot by pressing the Power button. |
Blinking Red |
| Factory reset in progress | Don’t unplug — wait for it to finish. |
FAQs
Your kit typically arrives within 1-3 business days, depending on when the order was placed. We ship self-install kits Monday through Friday, with Saturday delivery available.
Orders placed after Friday at 7 a.m. ship the following Monday.
For the strongest signal:
- Put it in a central, open area of your home.
- Keep it out of closed doors, cabinets, or behind panels.
- Avoid metal or glass surfaces nearby, which can cause interference.
Not every home does — and using too many can slow things down. Consider adding one if:
- Your home is larger than 2000 sq. ft.
- You have areas with weak Wi-Fi signal.
- You do a lot of video calls, gaming, or streaming and need strong, consistent coverage throughout your home.
Not sure? Use the Network Health tool in the GFIber App to check your coverage.
Wi-Fi 7 is the latest generation of Wi-Fi, built to deliver faster speeds, lower lag, and better performance — especially in homes with lots of connected devices.
Here’s what sets it apart:
- Multi-Link Operation (MLO): Your router and mesh extender can use multiple Wi-Fi bands — like 5 GHz and 6 GHz — at the same time, creating a faster, more reliable connection throughout your home.
Most phones and laptops don’t support MLO yet, but your Wi-Fi 7 Mesh Extender can still take full advantage of it. - Better range and reliability: The GFiber Wi-Fi 7 Router maintains strong signal quality farther from the router, so you’ll have fewer dead zones.
- Backwards compatible: Wi-Fi 7 works with older devices whether they use Wi-Fi 6, Wi-Fi 5, or earlier standards.
The biggest difference is MLO (Multi-Link Operation). It lets your router and mesh extender communicate across multiple bands simultaneously — faster and more reliably than Wi-Fi 6E.
The result is stronger coverage, multi-gig wireless speeds in more corners of your home, and performance that can even surpass some older wired connections like a CAT5e Ethernet cable. Wi-Fi 7 also brings improved reliability and security compared to older Wi-Fi standards.
MLO is automatically enabled between your GFiber Wi-Fi 7 Router and Wi-Fi 7 Mesh Extender on the backhaul link — the high-speed connection between them. Any device connected to the extender, wired or wireless, benefits from the increased reliability and speed this provides.
That said, most phones and laptops don’t support MLO yet — even Wi-Fi 7-capable ones. As the technology matures, MLO support for Wi-Fi 7 client devices will be added in a future software update.
Your GFiber Wi-Fi 7 Router comes with these defaults:
- 2.4 GHz and 5 GHz bands: WPA2 — works with the widest range of devices
- 6 GHz band: WPA3 — required by the Wi-Fi 7 standard
To boost your network’s security and performance, you can switch to WPA2/WPA3 Transition Mode in the GFiber App under Advanced Network Settings.
We’ll send you an email with return instructions, including which devices need to come back (and their serial numbers).
- Follow the steps in the email to return eligible equipment.
- If you are not required to return a device, this article shows how to dispose or recycle them properly.
With Wi-Fi 7 and MLO, a wired connection isn’t required for top performance — but you can still use one if your home has CAT5e or better Ethernet cables.
- Have Ethernet ports? Go ahead and connect — wired connections are dependable.
- No built-in wiring? No problem. Wi-Fi 7’s wireless backhaul can deliver multi-gig speeds to your extender, which can actually outperform many older cables like CAT5e (which max out around 2.5 Gbps).
- Gamers and power users: MLO can deliver multi-gig speeds wirelessly where older Wi-Fi standards couldn’t — so you can skip the long cables and still get a high-performance connection anywhere in your home.
| Feature | Wi-Fi 7 Router details |
|---|---|
| Wi-Fi configuration | 4x4 (2.4GHz), 4x4 (5GHz), 4x4 (6GHz) |
| WAN port (globe icon) | 10G (1 port) |
| LAN ports | 10G (1 port) 2.5G (3 ports) |
| CPU | Quad A73 @ 2.2 GHz |
| Flash | 4GB eMMC |
| RAM | 1GB DDR4 |
| MLO support | Dual-band (5GHz and 6GHz) |
| IP addressing | IPv4/IPv6 Dual Stack |
| EasyMesh | EasyMesh R4 |
| Router dimensions | 9" H x 3.5" W x 7.75" D |
| Power adapter dimensions | 3” H x 1.25” W x 2.5” D |