Set Up Your Own Router at Home

Quick Setup Guide
To install your own router:
-
Locate and power on your Fiber Jack.
-
Connect an Ethernet cable from the Fiber Jack to your router’s WAN port (globe icon).
-
Follow your manufacturer’s instructions to configure your Wi-Fi settings.
-
Save any GFiber-owned equipment. You will need it if you cancel service or move.
Total setup time: about 10–15 minutes.
What You Need to Get Connected
Before you begin, make sure you have:
-
Your own router: We recommend Wi-Fi 6 or higher, with a 10Gbps WAN port for multi-gig plans.
-
Fiber Jack power adapter: To power the wall-mounted Fiber Jack.
-
Ethernet cable: Cat6 or higher for the best speeds.
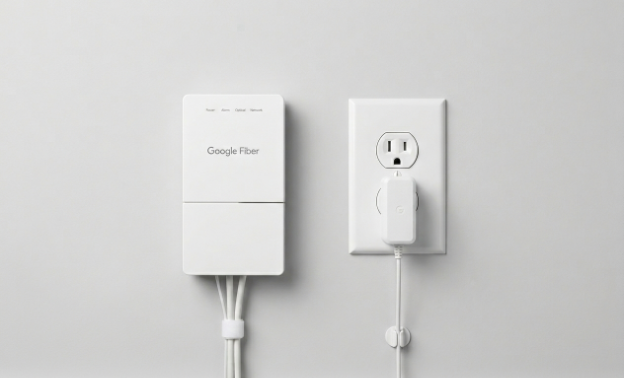
Step 1: Find the Fiber Jack

Your Fiber Jack is the small white box that connects your home to the internet. A technician may have installed this during your original appointment, or it could have been left there by a previous homeowner or tenant. Look for it on a wall, usually where the fiber line first enters your house through your NIU.
Check these common spots:
- Mounted on a wall in a central area or utility closet.
- Hidden inside a plastic media panel in a bedroom closet or behind the front door.
- Connected to an old router with an Ethernet cable.
There are two Fiber Jack models:
- Single-light model (blue lights)
- Four-light model (green lights)
Prefer to watch a video? See how to find your Fiber Jack.
If you still can't locate it, contact us.
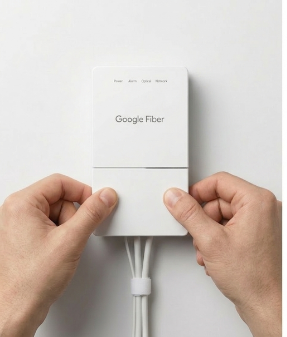
Step 2: Connect the Fiber Jack to Power
To connect your Fiber Jack to power, follow these steps:
-
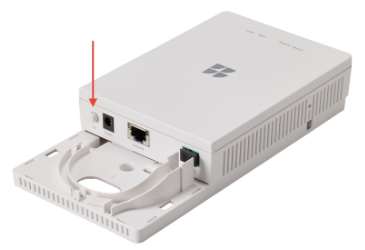
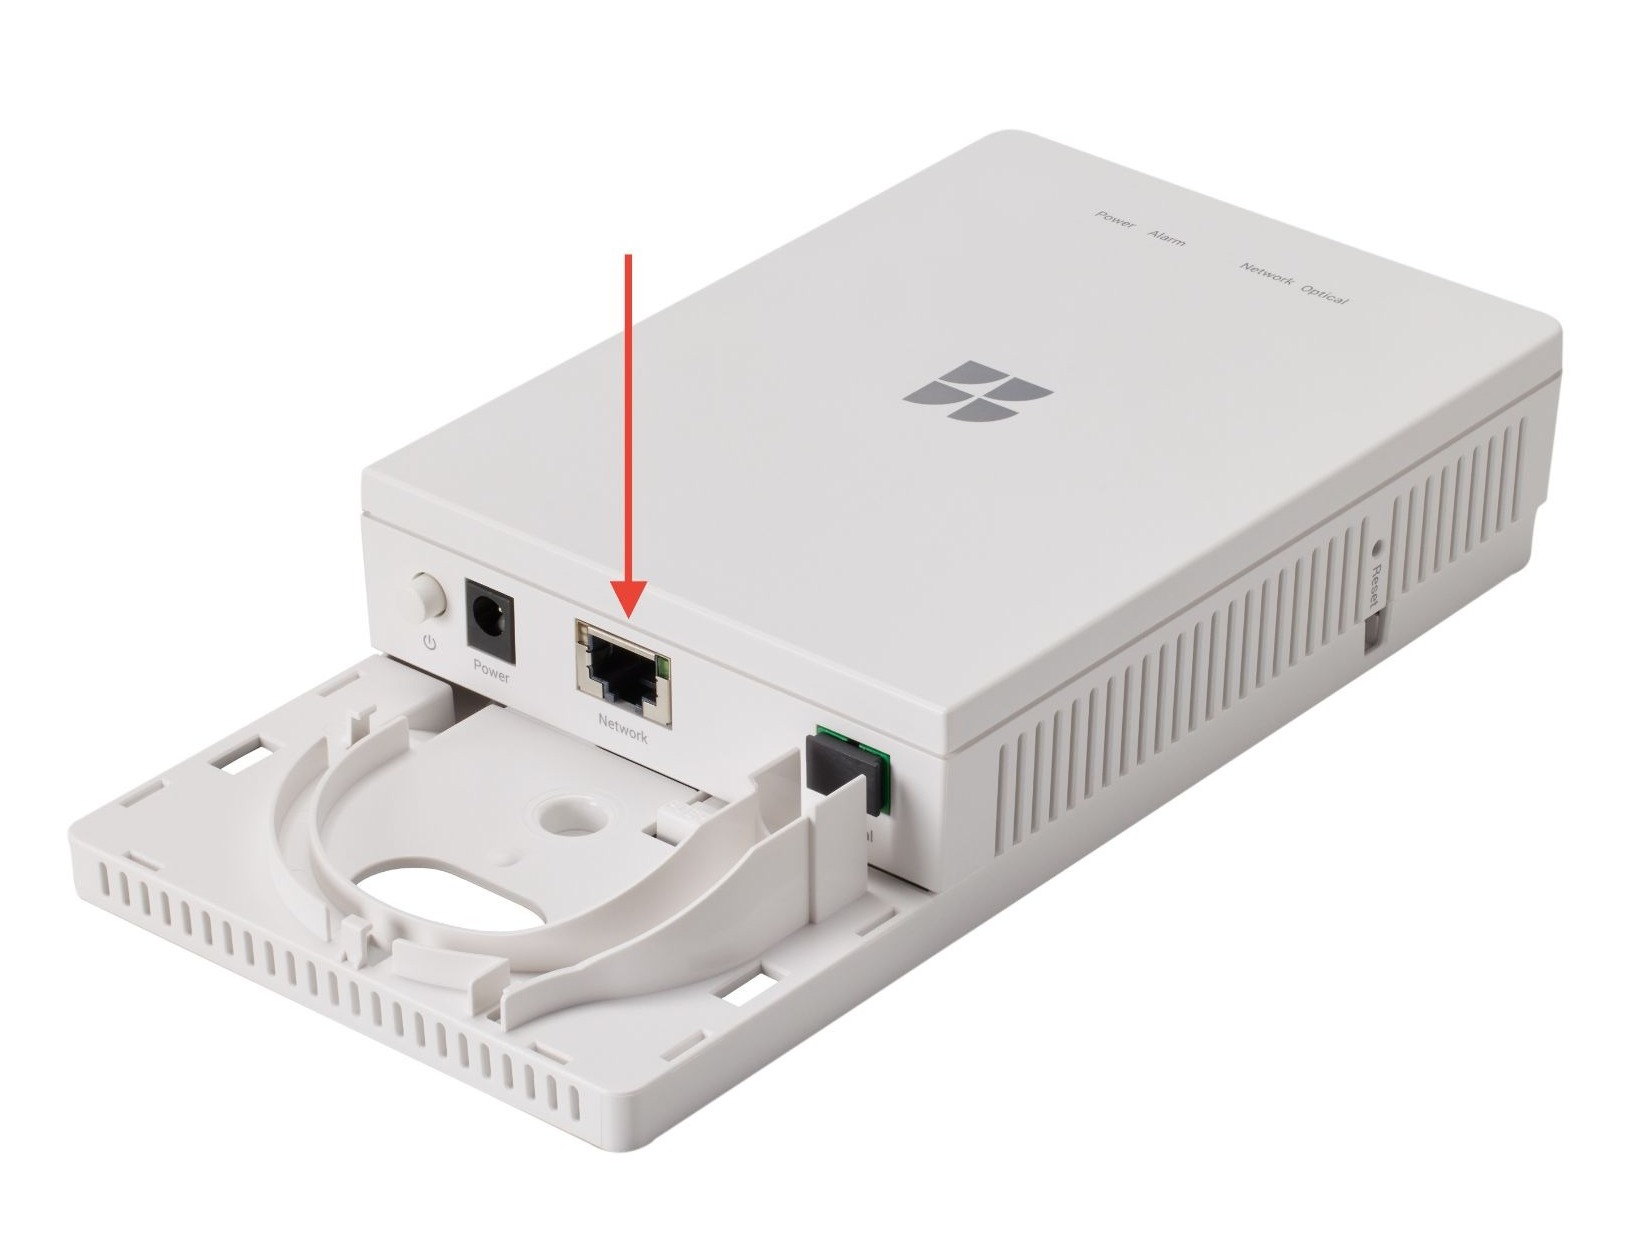
Remove the bottom cover of the Fiber Jack by placing your fingers in the side dents and gently pulling.
-
Check if the Fiber Jack is plugged in. If it is not, connect the power adapter from your self-install kit and plug it into a wall outlet.
-
The Power light should start blinking. If it does not, press the Power button on the inside left side of the Fiber Jack.
-
Wait for the light to turn a solid color before moving on.
Having trouble connecting? See our Fiber Jack troubleshooting guide.
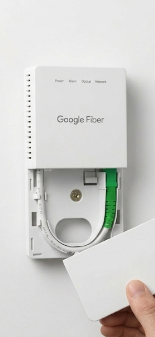
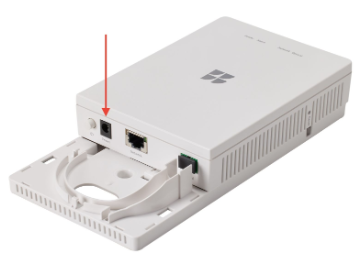
Step 3: Connect the Fiber Jack to Your Router
-
Plug one end of the Ethernet cable into your Fiber Jack.
-
Plug the other end of tthe Ethernet cable into the WAN port (globe icon) on your router.
-
Connect the router’s power adapter to a wall outlet.
-
Slide the Fiber Jack cover back into place.
Step 4: Set Up Your Wi-Fi Network
Since you’re using your own router, you’ll use your manufacturer’s app — not the GFiber App — to configure your Wi-Fi settings.
-
Open your router manufacturer’s app (e.g., Nest, ASUS, TP-Link, Eero).
-
Follow their instructions to name your network and set a password.
If you have a complex setup with multiple static IPs, you may need to enable Bridge Mode on certain GFiber hardware when a Fiber Jack isn’t present.
Router Compatibility Guide
To get the most out of your GFiber service, make sure your router meets these minimum specs:
Product | Recommended WAN port | Recommended Wi-Fi |
| 1 Gbps | Wi-Fi 6 |
| 10 Gbps | Wi-Fi 6E or Wi-Fi 7 |
| 10 Gbps | Wi-Fi 7 |
Returning GFiber Equipment
If you’re switching to your own router, hold on to your GFiber router for now — you only need to return it if you cancel your service.
When the time comes, you’ll get an email with more details. You can drop equipment off at a FedEx Office or visit a local GFiber Space.
FAQs
Yes. If you’re using a GFiber Multi-Gig Router as a gateway but want to use your own router for Wi-Fi, enable Bridge Mode in your GFiber account settings to avoid "Double NAT" issues.
Speed is often limited by your router’s processing power or the Ethernet cable you’re using. Make sure you’re using at least a Cat6 cable and that your router is rated for your specific speed tier.
Not for router settings. The GFiber App lets you view your bill and check the status of your incoming connection, but it can’t manage third-party router settings like passwords or port forwarding.
Business customers who need multiple static IPs must use their own router. Connect it to the Fiber Jack and configure your static IP information in your router's interface.